Zendesk
This page covers how to integrate Axosoft with your Zendesk account.
Note: For locally installed versions, start with Axosoft Installed Zendesk setup (requires Axosoft v14.4 or higher).
Enabling Zendesk in Axosoft
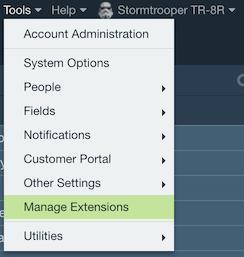
To enable Zendesk integration, go to Tools Manage Extensions then click the button in the IT & Helpdesk section to edit Zendesk settings.
Check the box for Active.

Enter in the Zendesk account details and select authenticate to connect to the account.

Then enter in the credentials on your login to Zendesk to complete the connection.
Creating Axosoft items on Zendesk tickets
From the Zendesk Axosoft addon there is the option to create a linked Axosoft item when creating a new ticket.

By utilizing the Axosoft API, when the ticket exists in Zendesk, a new associated item can be directly created in Axosoft with the desired values and the linked relationship is set.
Linking Axosoft items to Zendesk tickets
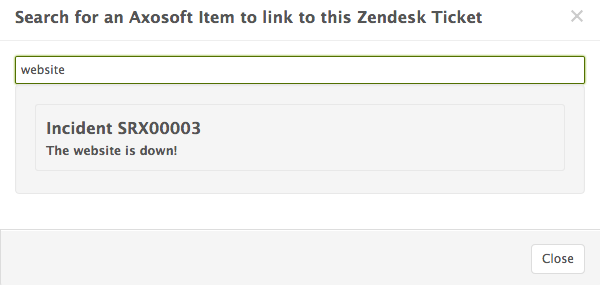
From the Zendesk Axosoft addon, tickets can also be linked to existing Axosoft items by opening the ticket then selecting the Link Item button.

Upon clicking the button, search and select the item to create the relationship.
Linked items will be shown in a list view on the addon.

Zendesk comments from Axosoft
Public or private comments can be made for the Zendesk Tickets pane in Axosoft by selecting the ticket then clicking Notify Ticket.

Enter the comment message to send, if it should be public or private in Zendesk, then click Save.

Updating Zendesk ticket status
Through Axosoft workflow steps, a post can be made to update linked Zendesk tickets.
A message can be made public or private and like workflow step actions, it can change the status of the Zendesk ticket and include a message.
Edit the workflow step under Tools Other Settings Workflows for which the Zendesk ticket update should trigger.

In the above example, when an item is moved into the “Closed - Resolved” workflow step, a private message will be posted to any linked Zendesk ticket and the ticket's status will be set to “Solved”.
Axosoft Installed Zendesk setup
The host for where Axosoft is installed must use SSL and be able to communicate with zendesk.com over port 443 on a public address, e.g. https://axosoft.example.com.
Zendesk client authentication for Axosoft Installed
- Go to Zendesk and log in as an Administrator, then click the gear button on the bottom left.
- Click on API under the Channels section, then the OAuth Clients tab.
Click the Add a client link then fill in the following fields.
- Client Name:
Axosoft - Unique Identifier:
axosoft_installed Redirect URLs:
https://store.axosoft.com/ontimenow/oauth/zendeskThe rest of the fields are optional and can be left blank.Copy the Client Secret as it cannot be retrieved again later (It's longer than 9 characters, so be sure to copy the entire Client Secret).
- Client Name:
Click Save.
Navigate to where your Axosoft website files are located (
C:\inetpub\wwwroot\Axosoftby default) and add a text file named user.config with the following contents:<?xml version="1.0" encoding="utf-8" ?> <appSettings> <add key="ZendeskClientId" value="axosoft_installed" /> <add key="ZendeskClientSecret" value="YOUR SECRET GOES HERE" /> <add key="ZendeskRedirectUri" value="https://store.axosoft.com/ontimenow/oauth/zendesk"/> <add key="ZendeskAppId" value="47179"/> </appSettings>Navigate to where your Axosoft Email Service files are located (
C:\Program Files (x86)\Axosoft\2017\Email Serviceby default) and insert the following into the AxosoftService.exe.config config file<add key="ZendeskClientId" value="axosoft_installed" /> <add key="ZendeskClientSecret" value="YOUR SECRET GOES HERE" />In both config files, replace the value for the ZendeskClientSecret key with the Client Secret copied from Zendesk earlier.
Restart the Axosoft website in IIS.
- Follow the instructions at the beginning for Enabling Zendesk in Axosoft.