Notification Templates
Emails sent by Axosoft can be configured with notification templates. To work with these templates, select Tools Notifications Templates from the menu.

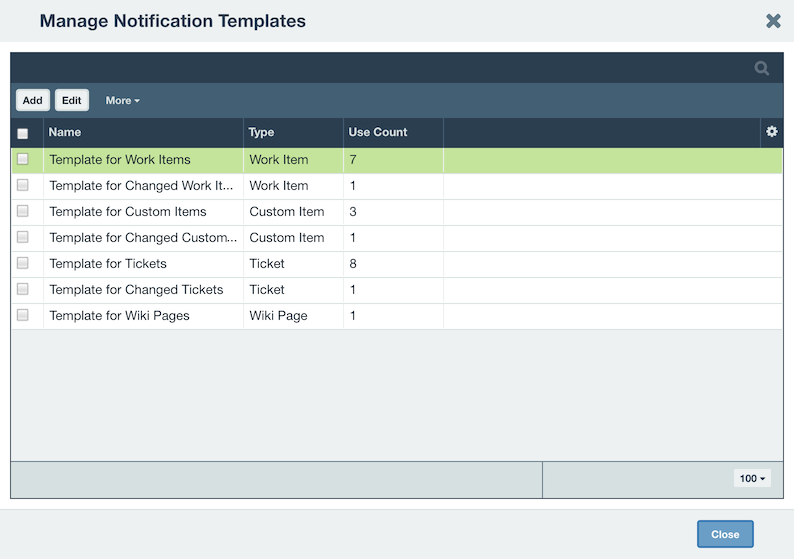
On the Manage Notification Templates screen, all notification templates that have been created will be visible and editable. Simply select one (this item will get highlighted in green) and click the Edit button in the toolbar to edit the template. To create a new item, click the Add button.
Editing a notification template
Name the template, and select what item type it will be used for. For Field Template, you can choose either the field template the affected item uses or a custom field template, in case you want to display fewer fields in the email. The field template's field data will be used in the email body with the placeholder parameter {ITEMDETAILS} (see more, below).

The From field allows a email address to be specified. Within the Subject field, you can use a combination of manually entered text and field values to build our subject line. To add a field value placeholder to the subject or body of the template, select the desired field from the Insert Placeholder Value option.
Note: You can set the From email address for this notification in the template which you may want to set from your domain. If you are importing emails from a POP/IMAP account to create or update items in Axosoft, make sure to set the From address to one of the accounts that is configured to pull emails into Axosoft so that any replies would be able to be added to the appropriate item.
Visit Configuring Email Accounts for more information.
You can preview the notification template by clicking 'Preview' at the bottom.
Configuring the item details table
The information included in the item details table, implemented using the {ITEMDETAILS} placeholder parameter, is set by the field template when editing the item (found in Tools Fields Field Templates). You can also set this table to use a custom field template by selecting the desired field template from the Notification Template settings at the top.
Filter-matched notification templates
For filter-matched notifications, because there can be multiple items included in the filter, the item details table will be displayed in a grid rather than a single column. Fields in this column are also determined by the field template.

Tip: If you are using the option for Send Consolidated Email, and use the [#ITEMID] in the subject line of the notification, it will not include the item ID in the email, because there are many items referenced in the same email. If this is the case, you may want to either create a new notification template or update your currently used template under Tools Notifications Templates that does not include the [#ITEMID] tag in the subject line.
If you need to include the item ID, uncheck the option for Send Consolidated Email as this creates a 1-to-1 ratio for notifications to items, and the item ID will be included in the subject line.
Notification settings
Access notification settings by going to Tools Notifications Settings.

By default, Axosoft will not send notifications to the user who triggers the notification. This is the recommended setting, but if you want to disable it, or temporarily turn off for testing, you can do so by unchecking this option. You can also turn off sending notifications, which is a good idea if you are doing mass updates of items or moving items as to not send a barrage of emails.
For Axosoft hosted subscribers, the Axosoft Web and Customer Portal Notification URLs should be set for you automatically, but if you have the installed version, you will need to update these URLs to point to the website for your Axosoft Web installations respectively so the link included in any notifications will be able to open the item in Axosoft.
You can also set the default notification template that is used for new notifications.