Axosoft Stopwatch
The Axosoft Stopwatch allows you to track the time you spend on items within Axosoft—and then submit that time to items in Axosoft. You can set as many independent timers as you need, configure automatic time-rounding options, quickly search and find items within your Axosoft system, and then submit work logs directly to those items within your Axosoft database.
Stopwatch prerequisites
- Axosoft API enabled
- Microsoft Windows Vista SP2, Windows 7, 8, 8.1 or newer
- Microsoft .NET Framework 4.5 or higher
You'll need a working instance of the Axosoft Web client (v13.2.1 or higher), and an active Axosoft user account. This can be either a locally installed instance of Axosoft or an Axosoft hosted account.
Stopwatch installation
Latest version: 16.4.1+
Legacy Stopwatch downloads:
Launch the setup file labeled AxosoftStopwatchSetup.exe and follow the simple setup wizard to determine the destination path for installation.
Stopwatch configuration & usage
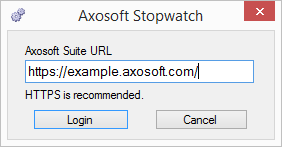
After completing the setup wizard, just launch the Axosoft Stopwatch program. Enter in the URL of your Axosoft website and click the login button.
This is the URL you use to log in and use Axosoft. Do not include pathnames like login.aspx or default.aspx.
Enter in your username and password to log in.
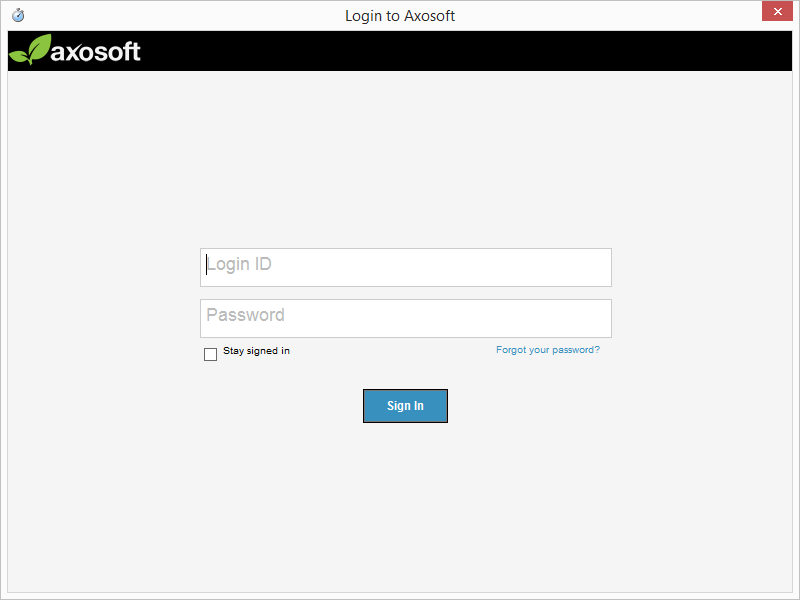
(If you are an installed user with Windows Authentication, then you will log in automatically.)

Click Allow to accept the permissions required to view and update work log data.
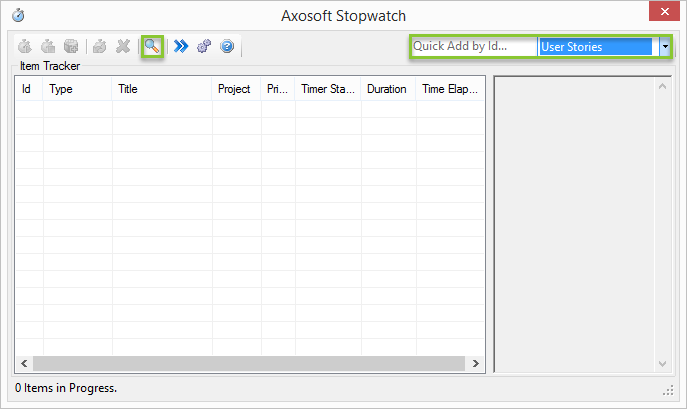
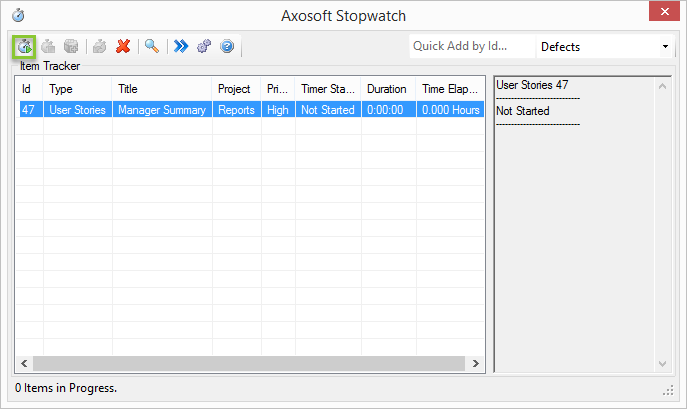
The first thing to do would be to search for items in Axosoft that you’ll be working on. You can search for items in two different ways:
If you know the exact item IDs, you can search for them in the Quick Add by ID field in the upper right-hand corner.
You can also search using the magnifying glass icon in the toolbar. From this search window, you can filter by Project, Item Type/Filter, and by Assignee (yourself or “Everyone”). Once you've set your criteria, click Search and the results will be displayed in the list below:
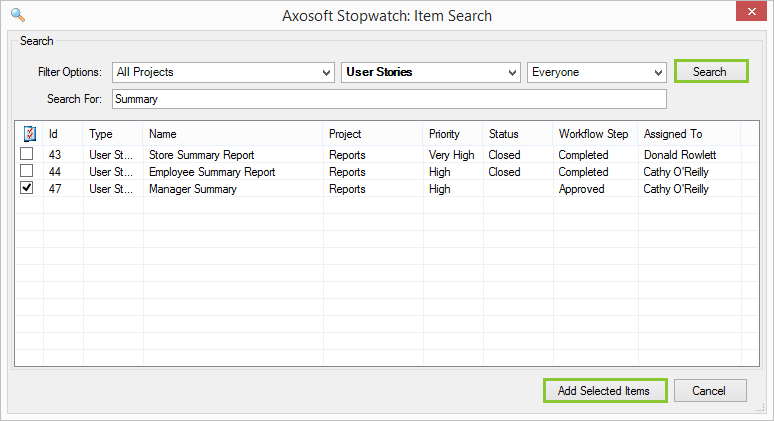
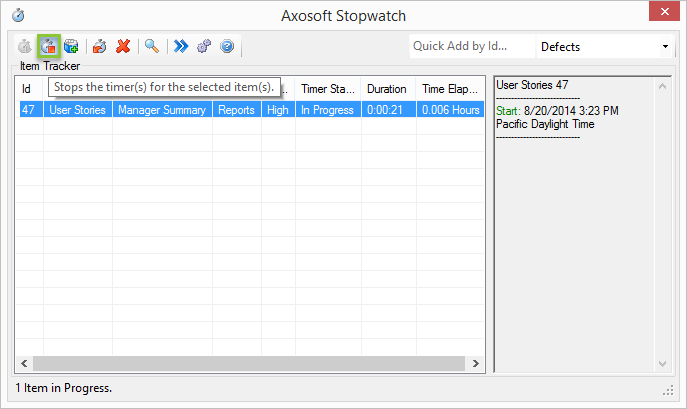
Once you've found the item(s) you need, select them and click the Add Selected Items button. The item(s) will appear on the main Stopwatch list. You're now ready to begin tracking time on the item while you work on it. When ready, select the item in the main list and click the leftmost toolbar button to begin the timer:
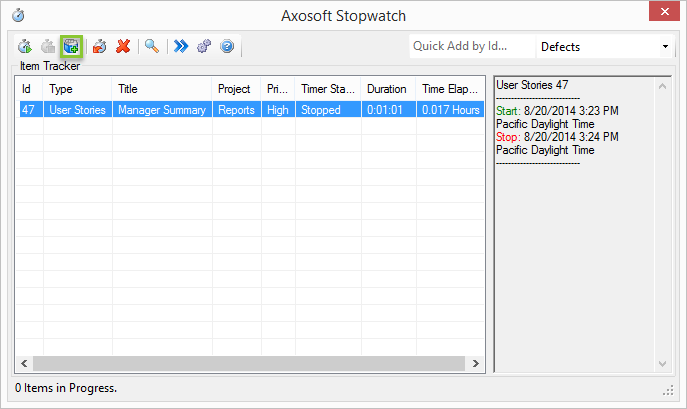
You'll see the Stopwatch beginning to count the time in the rightmost column. You can then minimize Stopwatch and start whatever task you're working on. When you're finished with your work, launch Stopwatch from your taskbar and click the second icon from the left to stop the timer.
You can click the third toolbar icon from the left to begin the simple process of submitting the time to the item in Axosoft as a work log.
The settings your Axosoft administrator has configured within Axosoft under General in Tools System Options for Work Log Settings will affect whether the estimates section will be displayed on the Submit Work Log window, and whether the Actual Time field will be automatically updated by the work log time you submit through Stopwatch.
In addition to being able to manually adjust the time value and the time unit, you can choose a work log type, add notes to the Work Log Description field, and even update the Remaining Estimate and Percent Complete fields. One additional feature is that you can also append your Work Log Description field with the start/stop details of the timer log. When finished, click OK to submit the work log to Axosoft.
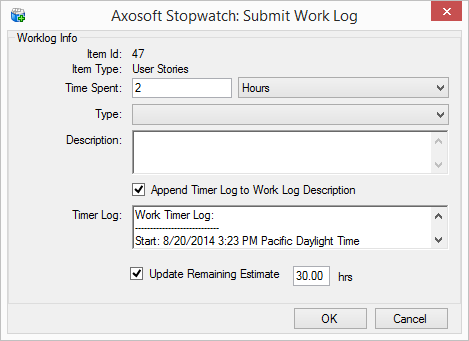
Note: In order to be able to submit the work log to Axosoft, your user account must have the Work Logs – Add/Edit permission within your security role. If you do not have permission to do so, Stopwatch will give you an error letting you know.
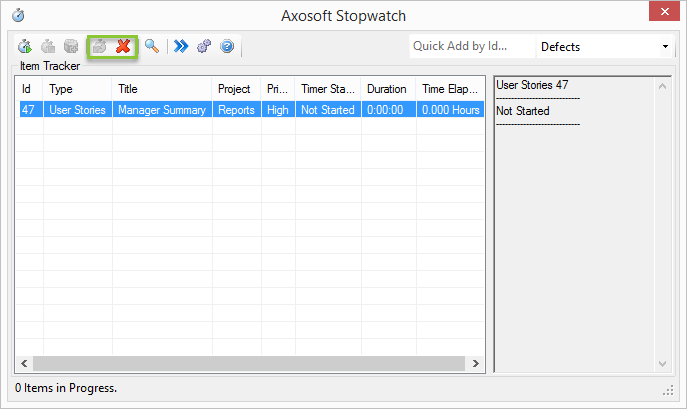
Once you've submitted the work log, you'll be taken back to the main Stopwatch window where you can either reset the timer for that item, or remove that item from the list by using one of the following two toolbar buttons:
Stopwatch options
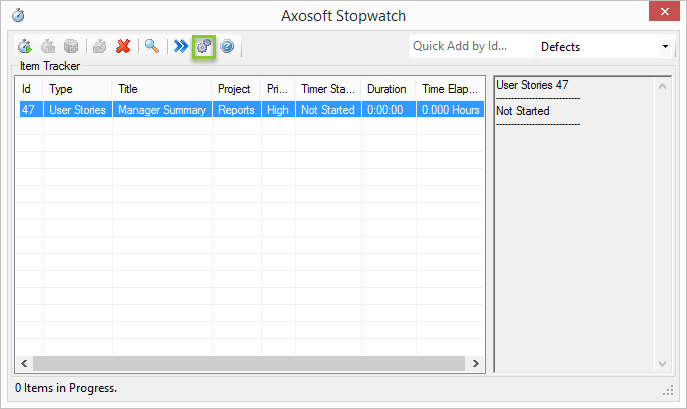
You can select from different default options for the Stopwatch operation by clicking on the gear icon at the top.
The available options are as follows:
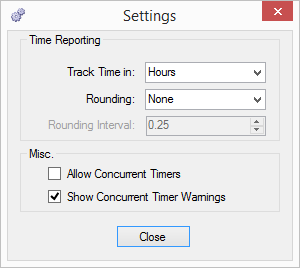
- Track Time in — You can select a default time unit to use for any work log entries you'll submit through Stopwatch. This is just the default, but you'll have an opportunity to change the time unit types before submitting work logs to your database.
- Rounding — You can choose to not round the time value at all, to round to the Nearest value, or to round Up or Down.
- Rounding Interval — You can configure the exact interval that Stopwatch will round to if Rounding is enabled in the preceding option.
- Allow Concurrent Timers — This option allows you to enable or disable multiple stopwatch timers that can be counting time simultaneously.