Scripting
Axosoft uses ActiveReports which can be customized using C# script. To create more advanced custom reports, a good understanding of scripting and ActiveReports architecture is necessary.
Basic scripting
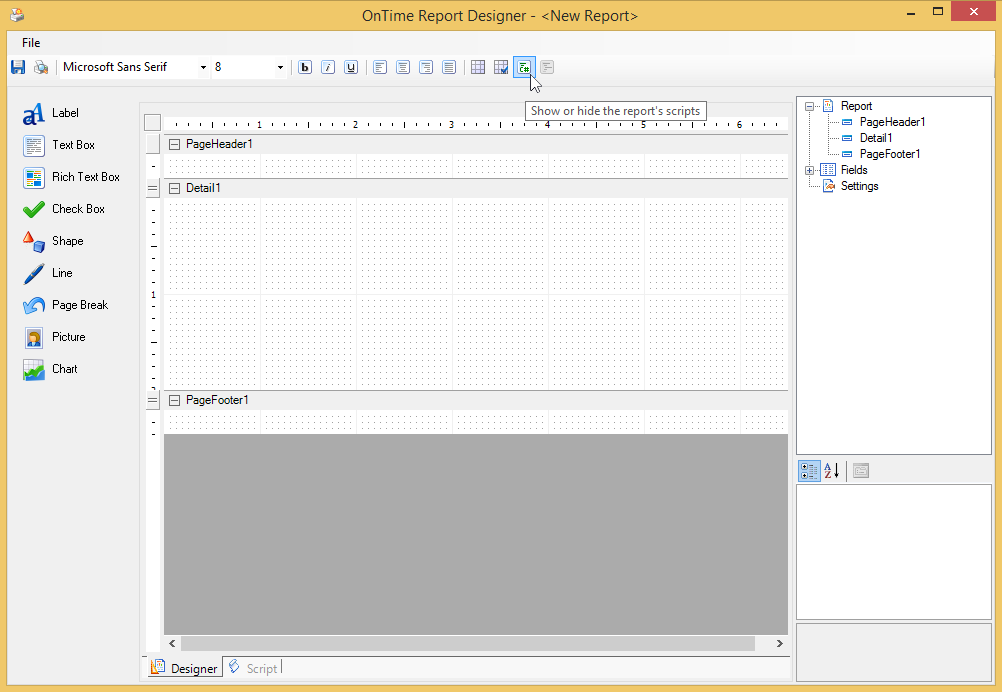
If you need to do more complex manipulation of the data on your report, use the scripting abilities of the ActiveReports designer. To view the scripting interface simply click the Show or hide the report's scripts button on the toolbar.
The default scripting language is C#. To enter scripts, first select an object from the Object dropdown. Objects listed in the dropdown represent sections on the report, and the ActiveReport object itself representing the entire report. Next select the event where you want to place the script in. The events depend on the selected object, with most sections only having 3 events: Format, BeforePrint, and AfterPrint. For most reports you would place the scripts in the Format event. Once you select the event, an event handler definition will be created for you.
Single-firing events
The following events are all of the events that fire only once during a report's processing. These events fire at the beginning and at the end of the report processing cycle.
ReportStart
This event fires before the DataInitialize event. Use this event to initialize any objects or variables needed while running a report. Also use this event to set any subreport control objects to a new instance of the report assigned to the subreport control. Do not add items dynamically to a report once this event has finished.
DataInitialize
This event fires after ReportStart. Use it to add custom fields to the report's Fields collection. Custom fields can be added to a bound report (one that uses a DataControl to connect and retrieve records) or an unbound report (one that does not depend on a DataControl to get its records). In a bound report the dataset is opened and the dataset fields are added to the custom fields collection, then the DataInitialize event is fired so new custom fields can be added. The DataInitialize event can also be used to make adjustments to the DataSource or to set up database connectivity.
ReportEnd
This event fires after the report finishes processing. Use this event to close or free any objects that you were using while running a report in unbound mode, or to display information or messages to the end user. This event can also be used to export reports.
Multiple-firing events
The following ActiveReports events fire multiple times during a report's processing.
FetchData
This event fires every time a new record is processed. The FetchData has an EOF parameter indicating whether the FetchData event should fire. This parameter is not the same as the Recordset's EOF property and is defaulted to “True”. When working with bound reports (reports using a DataControl), the EOF parameter is automatically set by the report; however, when working with unbound reports this parameter needs to be controlled manually.
Use the FetchData event with unbound reports to set the values of custom fields that were added in the DataInitialize event or with bound reports to perform special functions, such as combining fields together or performing calculations. The FetchData event should not have any references to controls on the report.
If you need to use a value from a dataset with a control in the Detail section, set a variable in the FetchData event and use the variable in the section's Format event to set the value for the control. Please note that this method of setting a variable in the FetchData event and using it to set a control's value is only supported in the _Detail_Format_ event.
Also, use the FetchData event to increment counters when working with arrays or collections.
PageStart
This event fires before a page is rendered. Use this event to initialize any variables needed for each page when running an unbound report.
PageEnd
This event fires after each page in the report is rendered. Use this event to update any variables needed for each page when running an unbound report.
Accessing fields and controls
Managing fields and controls in the Axosoft Report Designer is managed through the script of the report.
Accessing fields
To access fields from the data source use the following syntax:
rpt.Fields['DueDate']
Note: The rpt variable is the equivalent of this for the report class.
    if (rpt.Fields.Contains('DateFound') && rpt.Fields['DateFound'].Value != null)
    {
        // execute some code
    }
Accessing controls
To access controls on the report, you need to use the following syntax:
((TextBox)rpt.Sections['Detail'].Controls['txtDueDate']).Text
((RichTextBox)rpt.Sections['GroupFooter3'].Controls['replicationRichTextBox']).Text = 'Some Text';
Global properties
There are four special global variables which are passed into an Axosoft report at runtime that can be used dynamically in scripting. All of these global variables are designed to be read-only; they provide information to the report at run-time and changing the variable does nothing to the report itself.
Report title
- Variable Name:
rptTitle - Variable Type: string
- Description: This variable returns the name of the report shortcut associated with this report. This should be used to display the name of the report at the top of the page. This way, if a user changes the shortcut name, the report title in ActiveReports can be populated with their new name. Remember that the shortcut is the name of the report that appears in the dropdown menu that your users will see.
public void PageHeader_Format()
{
    ((Label)rpt.Sections['PageHeader'].Controls['labelTitle']).Text = rptTitle;
}
Selected project
- Variable Name:
rptSelectedProject - Variable Type: string
- Description: This variable gives the name of the project currently selected by the user in the Projects pane. Since Axosoft is already filtering the report data by the project selected, this field will allow you to display the user's project. This is most typically used to display the user's currently selected project at the top of the report.
public void PageHeader_Format()
{
    ((Label)rpt.Sections['PageHeader'].Controls['labelSelectedProject']).Text = rptSelectedProject;
}
HTML details
- Variable Name:
rptPrintHTMLDetails - Variable Type: Boolean
- Description: This variable provides the state of the user's “Print Item Details as HTML” setting. This setting allows the report designer to dynamically know if some of the user's data will be in HTML format or not.
if (rptPrintHtmlDetails)
{
    ((RichTextBox)rpt.Sections['GroupFooter4'].Controls['descriptionRichTextBox']).Html = _description;
}
else
{
    ((RichTextBox)rpt.Sections['GroupFooter4'].Controls['descriptionRichTextBox']).Text = rptHelper.HtmlToText(_description);
}
Selected group
- Variable Name:
rptSelectedGroupField - Variable Type: string
- Description: This variable returns the name of the group that the user currently is grouping data with in Axosoft. This variable is used to create dynamic grouping. Users can sort their data by a specific group in Axosoft and then run a report and see their data grouped in the way they chose; this variable is required to provide that functionality.
if (rpt.Fields[rptSelectedGroupField].Value.ToString().Length > 0)
{
    ((Label)rpt.Sections['autoGroupHeader'].Controls['labelGroupHeader']).Text = rpt.Fields[rptSelectedGroupField].Value.ToString();
}
else
{
    ((Label)rpt.Sections['autoGroupHeader'].Controls['labelGroupHeader']).Text = '[None]';
}
Grouping data
When scripting a report, it is important to understand that there are two main ways to group your data:

- Grouping the data the same way every time (static)
- Grouping the data based on the user's selection on the group box in Axosoft (dynamic)
The first method should be used for times when the report must have the data sorted the same way, every time. The second method should be used when then report needs a different sort each time. Let's examine how to create sorts for these different cases.
Note: Previewing a report in Design Mode does not incorporate any grouping functionality! To test your grouping, create a shortcut of your report and preview the shortcut.
1. Group data statically the same way every run
This method is very easy and does not require any actual scripting. Open your report and select the group header section (if you do not have a group section, right-click on the report and selectInsert Insert Group Header/Footer). Once the group header is selected, look down at the Properties window and find the DataField box. The DataField box will list all of the fields that your data can be sorted with. Simply select the field you wish to sort your data with, and ActiveReports will handle the rest.
2. Group data dynamically based on the user's selection
To create a report where data is sorted on-the-fly, you will need to perform the following steps:
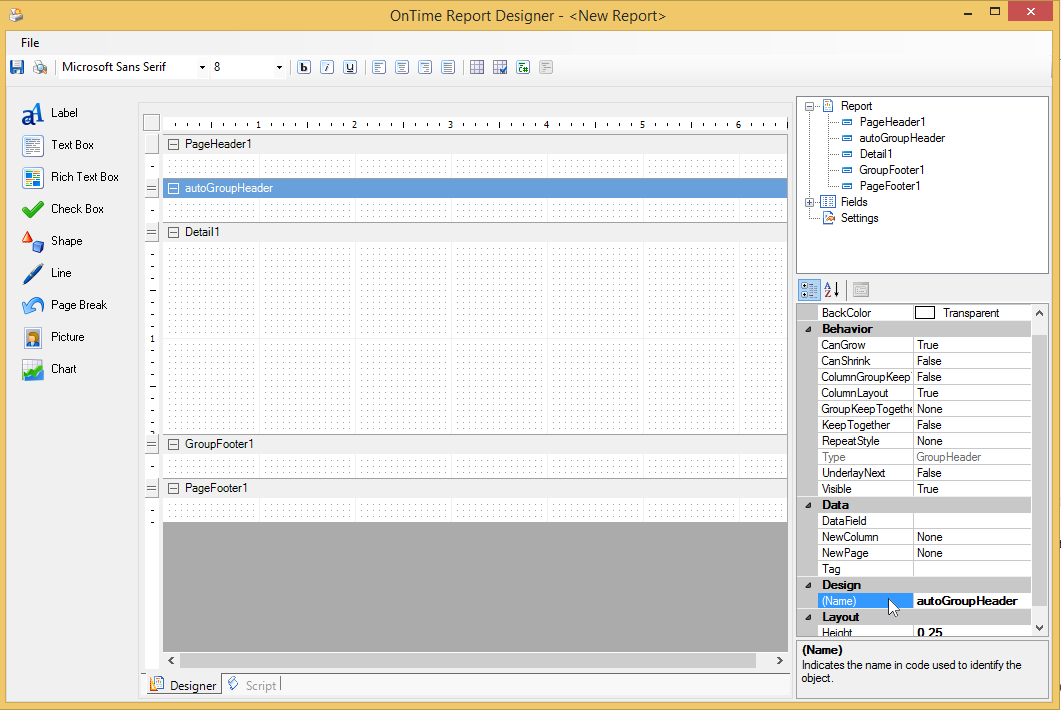
- Create a Group Header
- Change the Group Header name to
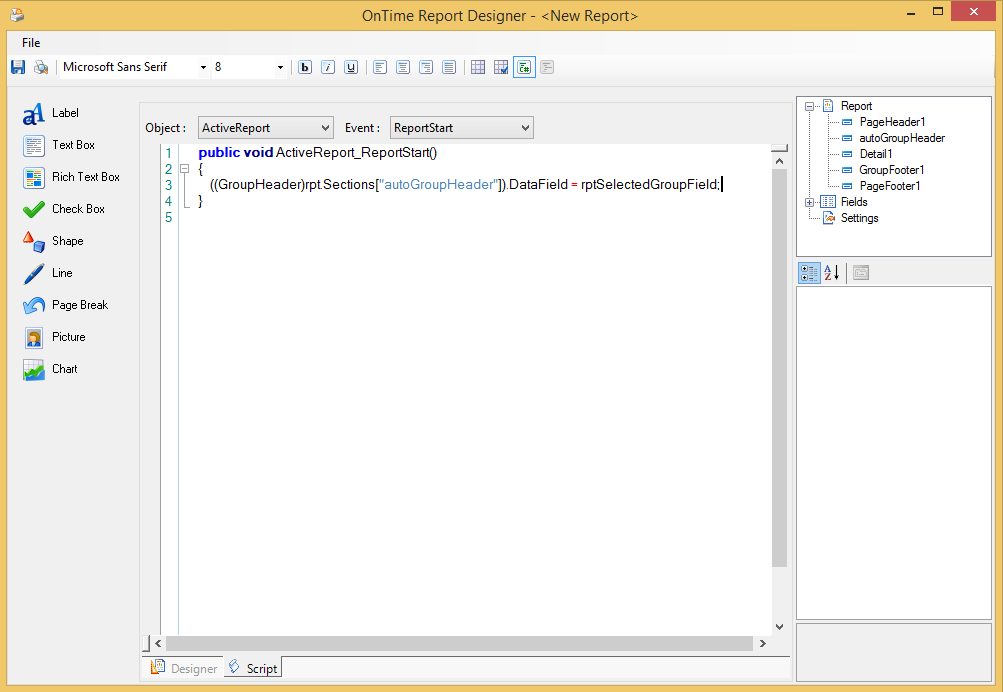
autoGroupHeader - Insert this code into the
ActiveReport_ReportStart()portion of code:
((GroupHeader)rpt.Sections['autoGroupHeader']).DataField = rptSelectedGroupField;
This code uses one of Axosoft's Global Variables named rptSelectedGroupField. This variable controls which group the user selects in Axosoft.