Managing Workflows
Axosoft comes with default workflows to help your team get started, but you can modify or create new workflows that fit your needs, with a variety of aspects:
- Use role-based security to control who can move items between workflow steps
- Prompt users to update their work logs when an item changes workflow step
- Create unique workflows for each project folder
- Change an item's field templates based on workflow step
- Automate changes based on items being moved to a new step
- Send email notifications to relevant users when an item is moved to a new step
- Use custom integrations to open a URL for the current user making the workflow step change
- Illustrate your workflow and the current state of your backlogs with Card View
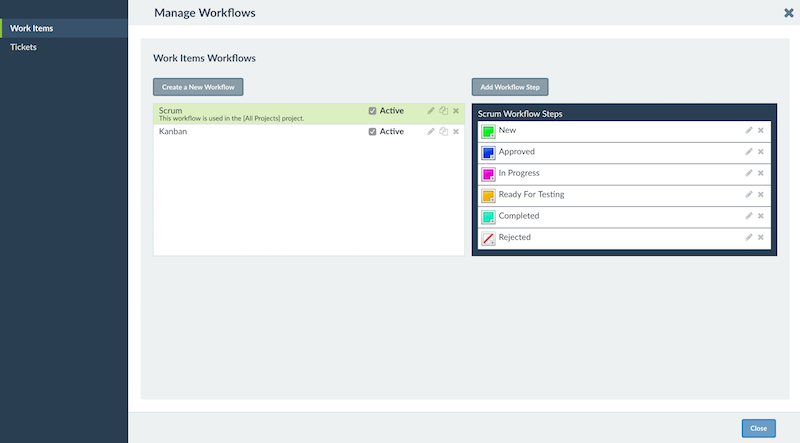
To manage and define workflows, go to Tools Other Settings Workflows. You can also right-click on the column header of any workflow column in Card View and select Edit Workflow Step or Edit Workflow.
IMPORTANT: We do not recommend assigning a new workflow to an existing project folder. Assigning a new workflow will not move existing items over to your new workflow and result in undesirable side effects in your filters, grouping, and card view. Instead, make modifications to the existing workflow from Tools Other Settings Workflow.
Organizing and editing workflow steps
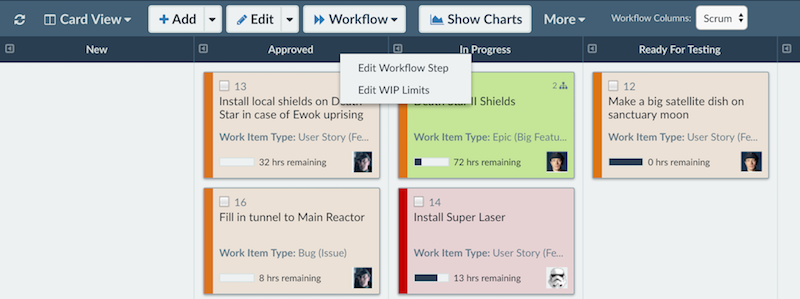
Workflow can be easily updated from the Workflow drop down menu in the workspace toolbar. With an item selected, navigate to this menu to update the workflow step.
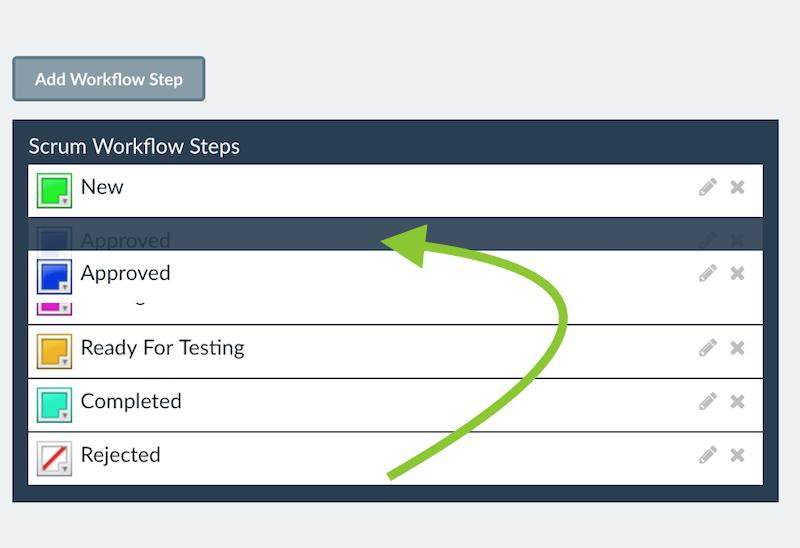
Reordering workflow steps will rearrange how they are displayed in dropdown menus, as well as when showing workflow step columns in the Card View. Reordering the steps does not affect any permissions or allowed next steps for the workflow.
Click the Edit icon to open the Edit Workflow Step screen.
Selecting the associated field template
You can select unique field templates to display for each workflow step. To create a new field template for a workflow step, go to Tools Fields Field Templates, and then select the new template here. Selecting “[Project Default]” will load the template in used by the project associated with your workflow.

If this is the first workflow step, then the selected field template here will be used when adding items to the project.
Tip: If you are associating a field template with new required fields that are not included in previous steps, select the option for Force Edit to require all required fields be entered before the item can be moved to the new workflow step.
The associated field template allows you to display pertinent fields of the workflow step to where an item is changed. This applies to when a user selects Edit using workflow template or when they select the the workflow step from the dropdown on the main taskbar.
Note: The associated field template does not apply when an admin chooses Edit using project template which uses the template in project settings. It also does not apply when a user double clicks an item for view.
Editing workflow steps in the Card View
Editing workflow step settings in Card View is extremely quick and easy, just right-click on the column header and select Edit Workflow Step.
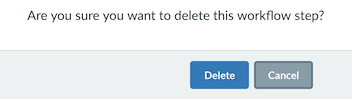
Deleting workflow steps
To delete an existing workflow step, click the Delete icon next to the workflow step.
Associating projects with different workflows
To select which workflow a project uses, select the project from the Projects pane in the Organize Panel, click Edit in the pane toolbar and select Workflow on the left. If you want the project to inherit the workflow settings from its parent project, select Inherit workflow. The name of the inherited workflow and the project it is inherited from are displayed underneath the radio button. By default new projects inherit from their parent.
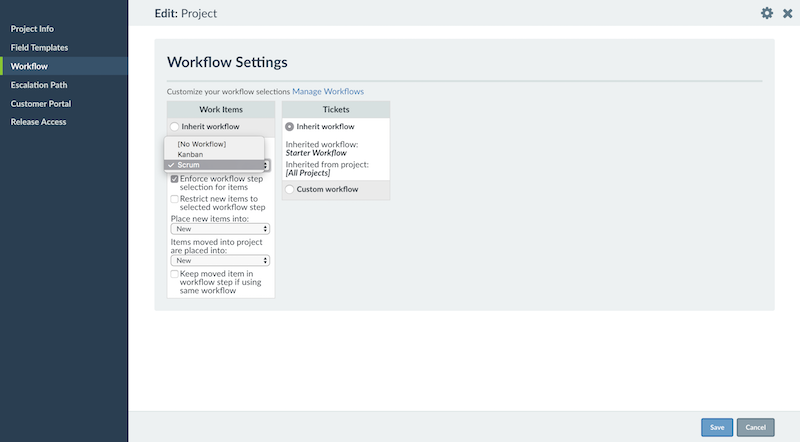
If you want to select a specific workflow for a project, choose Custom workflow, then select the workflow you want to use from the dropdown. The following settings are available:
- Enforce Workflow selection for items — With this option checked, all items must be placed in a workflow step when being created (removes the “[No Workflow Step]” option)
- Restrict new item to the selected workflow step — This option requires that all items created would have to first be saved in the workflow step that is selected below.
- Keep moved item in workflow step if using same workflow — This option ensures that when changing an item's project, if the old and new project both use the same workflow, then the item will stay in the same workflow step in the new project
Tip: We recommend checking all of these options so that when adding items, they would first need to be saved in your first workflow step, and then moved through your defined workflow process to be completed.
Deleting workflows
To delete an existing workflow, click the Delete icon next to the workflow in the Manage Workflows screen. A window will pop up asking you to confirm the deletion of the workflow.
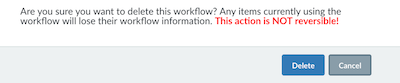
Warning: Once you click OK the workflow and all of its steps will be deleted. This action is not reversible, so only delete workflows if you are certain it will not be needed in the future. You can always set the workflow to be “inactive” if it's not being used.