Portal Setup Guide
This page details how to set up the customer portal. Administrator permissions are required to get started, so be sure to work with your Axosoft administrator if you do not presently have the necessary permissions.
Where do I start?
When setting up the portal, we recommend you start with Portal Security Roles. Navigate to Tools Customer Portal Portal Security Roles and edit a role (ex. Default Security Role). Consider creating portal security roles for different customer groups, or perhaps use one security role for all Portal users. It’s up to you how you want to set up your Portal security role!

Note: The Anonymous security role controls what people can see with only your Portal URL. This role has no permissions by default, however you may edit the role to update from Tools Customer Portal Portal Security Roles
Editing Security Roles
Tip: The Customer Portal permissions only applies to items where Show on Portal checkbox is selected. Customer Specific Permissions applies to items where the Customer Contact is set. The two permissions are independent of each other.
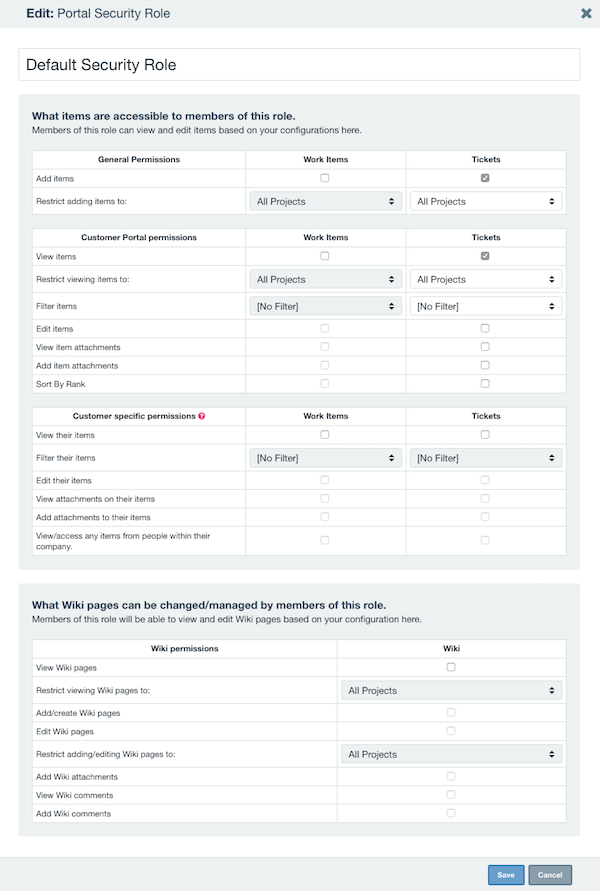
General Permissions
In General Permissions, you can restrict users' view of which item types they can add. This can be limited by all projects, an individual project, or no access at all. These items can also make use of filters.
Customer Portal Permissions/Customer Specific Permissions
In the long screenshot above, distinct Permissions are set for the security role:
- View Items — Allows Customers to view all Items within Projects they have access to view and are set to Show on Portal
- Add Items — Allows Customers to add new items
- Edit Items — Allows Customers to edit Items
- View/Add Attachment — Allows Customers to view/add attachments
- Sort By Rank — Allows Customers to sort items by rank. Only Axosoft users can set the Rank.
- View/Edit Their Items — Allows the viewing and editing of items assigned to this Customer Contact
- View/Add Their Attachment — Allows the adding and viewing of attachments on items assigned to this Customer Contact
- View/Access Any Items From People Within Their Company — Allows this contact to view all items assigned to contacts from the same company
Show on Portal items refer to items where the Show on Portal field is set to true. Show on Portal is a field included with all items in Axosoft and can be set like any other field, either by default when adding items or while editing items. If you do not have the Show on Portal field available when editing the item, add it to the template by clicking the gear icon in the upper right of the template window.
Notice: Portal users will not be able to update the Workflow Step field. This permission is reserved for fully licensed Axosoft users, so if you need an individual to update a workflow step then consider adding an Axosoft user.
Comments in Portal
Portal users may only make comments to items if:
- Portal user has Edit Items permissions
- Comments field is included on the project's portal field template
If both of these conditions are satisfied, portal users will also gain permission to add Comments from their Details Panel.
Testing the customer's view
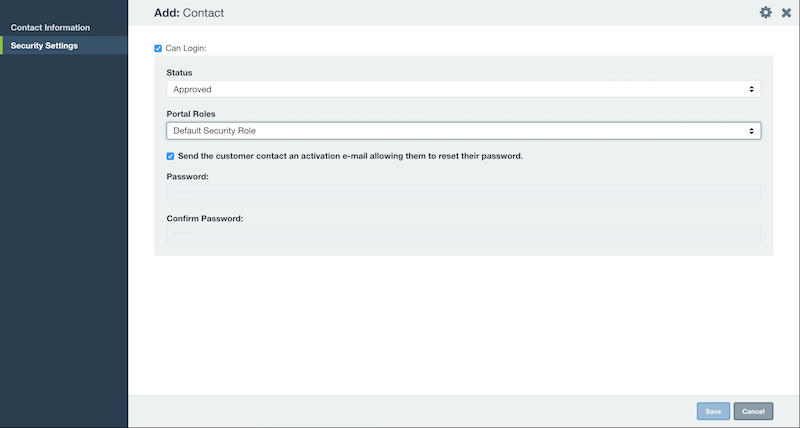
Make a dummy portal user to test what a customer sees in the portal with portal security role you just edited. You may add yourself as a contact by navigating to Tools Customer Portal Customers and Contacts. Use the Add button in the upper-left to create a new contact with their name, email, and security role.
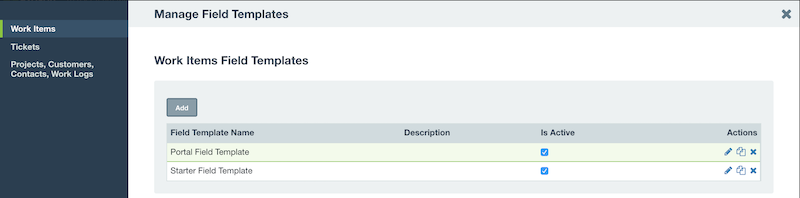
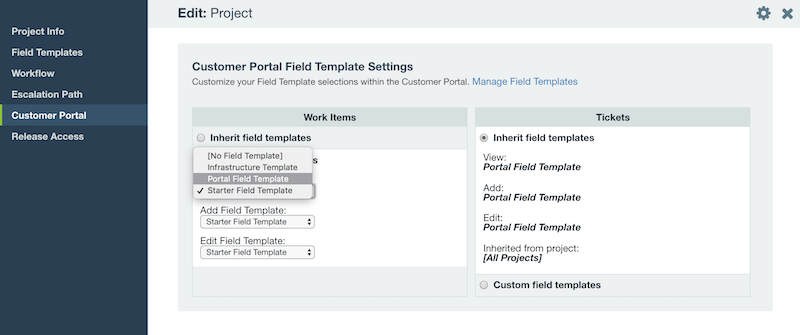
Axosoft allows you to set a unique field template for viewing, adding, or editing items in the portal on a project folder by project folder basis. You can also decide to use the same universal Portal Field Template for all three cases for all projects.
Set up your Portal Template(s) by navigating to Tools Fields Field Templates. You will see your item categories to the left. In each category (with the exception of Projects, Customers, Contacts, Work Logs) you will see the default Portal Field Template. Edit the template to customize the field layout.
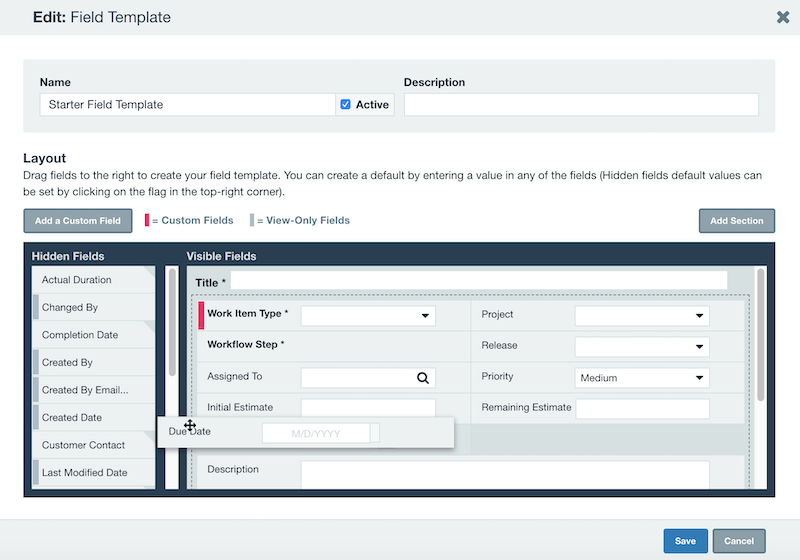
Drag and drop fields from the predefined fields on the left or add a custom field. You can hover over any field on the template to make it required or an editable field. If you are new to templates, be sure to learn more about Field Templates.
Once you are satisfied with your Portal Field Template, you may apply the template to any project folder by editing the project folder in the Organize Panel.
Be sure to also review your settings from Tools Customer Portal Settings which are documented further under Portal Settings.
From here, log in as your dummy portal user and adjust the portal permissions. You may then add the rest of your customer contacts from Tools People Customers and Contacts.
When can a portal user see an item?
If you grant the portal security role permission View/Edit Their Items, then this will allow the viewing and editing of items assigned to this Customer Contact. Items must be first associated to the correct Customer Contact before this will take into effect. To associate an item to a customer contact, drag and drop the item to the contact in the Organize Panel or edit the Customer Contact field directly in the item's field template.
If you grant the portal security role permission View Items, this allows Customers to view all items within Projects they have access to view and are set to Show on Portal. If the Show on Portal field is not checked, then this portal user will not be able to see the item.
If you grant the portal security role permission to View/Access Any Items From People Within Their Company, then this allows this contact to view and edit all items assigned to contacts from the same company.