Using the Portal
This page details the basic process for working with items and the Portal interface as a portal user. If you are a portal user, you may or may not have access to all permissions shown below. Be sure to work with your Axosoft administrator for more details.
Adding items in Portal
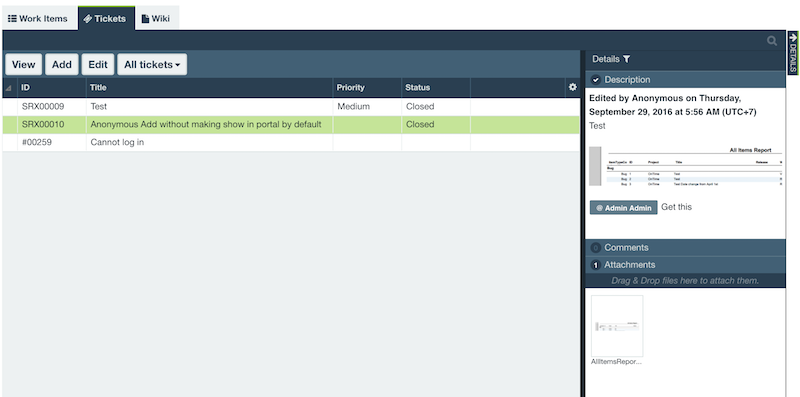
Items can be easily added to your backlog by customers and other external users. When a Portal user logs in, they will have access to the main toolbar as shown below.
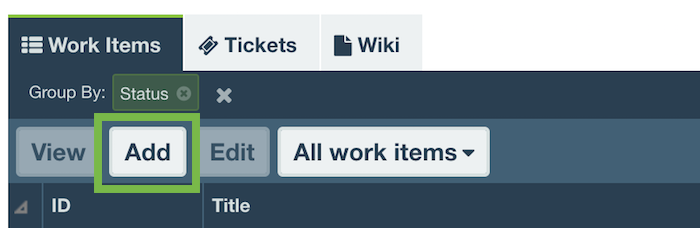
To add and item, click the Add button highlighted in green and enter the data in the fields before you click Save and Close.
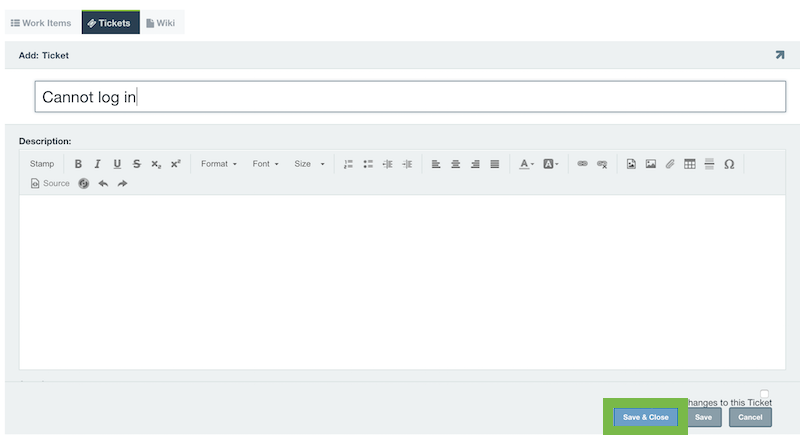
To customize what item types Portal users can see and add, consider reviewing your Portal Security Roles. To customize what fields the customer contact sees when they add an item as shown above, then visit Field Templates.
If you are a Portal user and you have questions about what you can see, contact your Axosoft administrator so they can lend a hand.
Editing items in Portal
If granted permission, portal users can edit their submitted items in Portal.
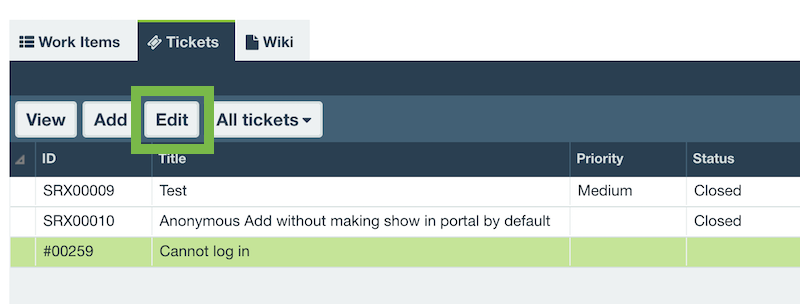
To edit an item, select it in the List View and click the Edit button. This will bring up the Edit screen.
Notice: Portal users will not be able to update the Workflow Step field. This permission is reserved for fully licensed Axosoft users, so if you need an individual to update a workflow step then consider adding an Axosoft user.
Voting
Voting on items is a great way to get feedback from your team or from customers, to see their favorite new feature requests or most pressing issues. Team members and (if the item is public) Portal users may only vote on issues once, selecting from 1 to 5 stars and are able to change their vote if needed. This is done so that no one individual can vote multiple times for the same item.
Enabling voting
Voting is enabled by default for new databases, but you can toggle it on or off by going to Tools System Options and click Allow users to vote on items under the User Settings section.
Voting on items
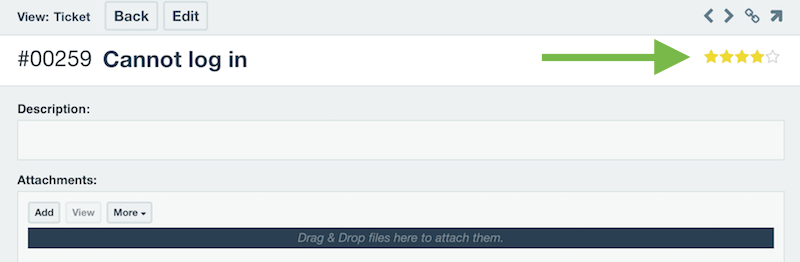
Whenever viewing or editing an item, you can vote by clicking the number of desired stars by the title. This will also show the vote average of any previous votes for the item.
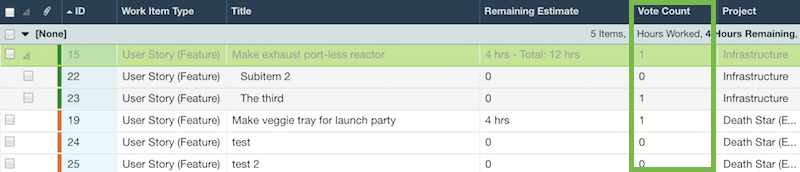
Viewing vote count and average
You can view the vote average and count for any individual item when in the View Item screen, or add these columns to the item grid using the gear icon in the upper right. You can even create filter conditions based on the vote count and average fields.
Details Panel
The Details Panel in Portal displays detailed information for the selected item and allows you to customize your view so the most important information to you is easily visible. The Details Panel is broken up into panes.
Click on the title of each pane in order to expand or collapse the pane. When a pane has information available, a blue indicator is shown next to the title.
Collapsing the Details Panel
Click the arrow to collapse the panel.
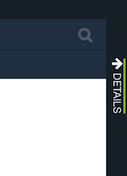
Expand by clicking the arrow that points to the left.

Showing and hiding panes from the Details Panel
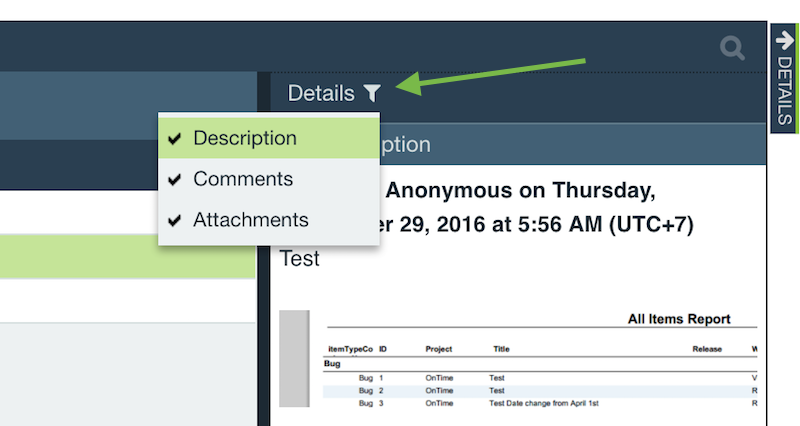
To show or hide panes for your personal view, just click on the filter icon at the top of the Details Panel.
Filters
Filters allow Portal users to limit which items are being displayed in the main item grid at any given time. There are four types of filters that can be applied:
- All Items
- Company Items
- My Items
- Public Items
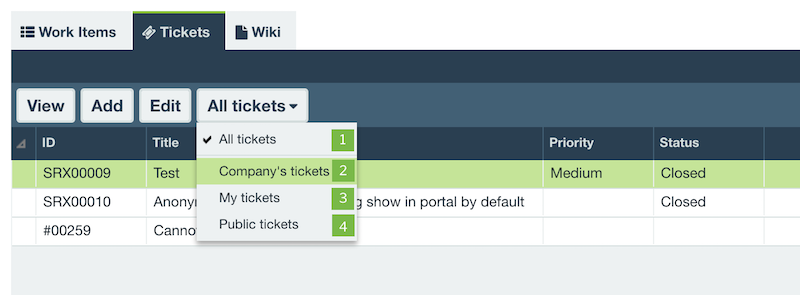
Select the desired filter from the Filter dropdown in the workspace toolbar.
Grouping
Grouping is the process of listing data by category within a certain field. The resulting view provides a block or paragraph of data for items with the same field value.
Why Group By over Sort? Grouped items are easier to view than sorted items. Each group of results is visually distinguishable from the next, including valuable extra data such as combined remaining estimate.
Additionally, unlike sorting items, when Group By is used the grouping field does not need to be visible in the current view. This allows users to set up a grouping based on columns that are not currently visible without adding the column to the current view.
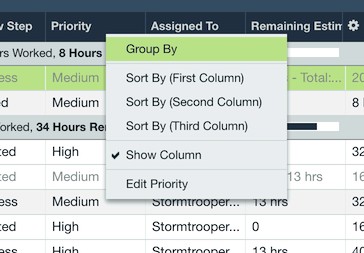
Grouping in the Portal workspace
Right-click on a column header in the Portal List View and select Group By. You can sort within any grouping by clicking on the column header to sort items.
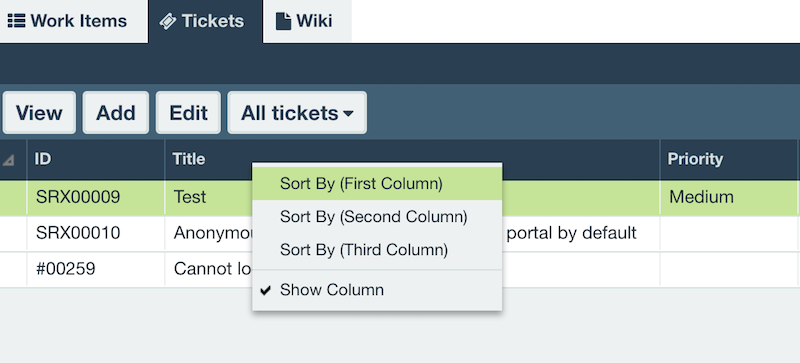
Sorting
You can sort items in the Portal List View by right-clicking on the column header, and choosing a column to sort by, or clicking the column header to sort in ascending or descending order.
Exporting
Contacts have the ability to export items from the Customer Portal into a .CSV by selecting Export.

Only items and fields shown in the Portal List View will be exported. You can use the search or filters to remove items. Similarly, you can add or remove fields by selecting the gear icon on the right side.