Managing Users
Users are the individuals that interact with your backlogs. They are creating and editing items, adding work logs, moving items through the workflow, and some are administrating the whole process!
Creating users is easy, and they can be edited or deleted as needed. Active users can log into Axosoft and are counted against your license or subscription. Inactive users cannot log into Axosoft nor will be counted against your license or subscription, but their name and information can still be utilized within the tool.
Also, users must be assigned at least one security role in order to determine their level of access to various features and projects within Axosoft.
The Manage Users screen
The Manage Users screen is used to add, delete, and modify users in your Axosoft system. This interface also shows a summary list of the users and their information for the system, as well as detailing which users are active.
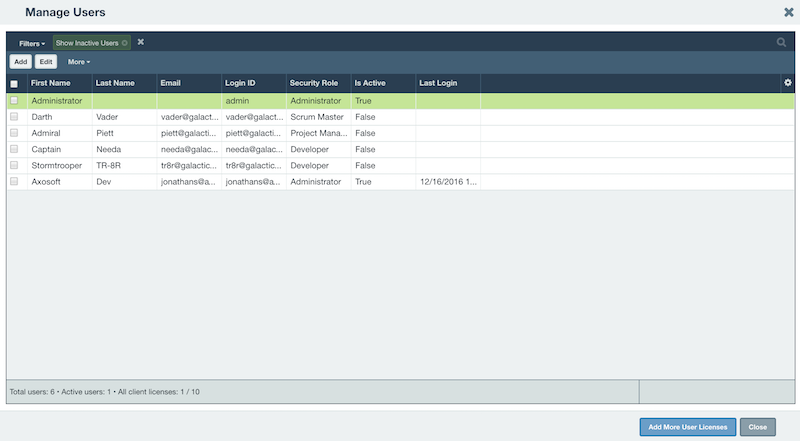
To access the Manage Users screen, go to Tools People Users.
Creating new users
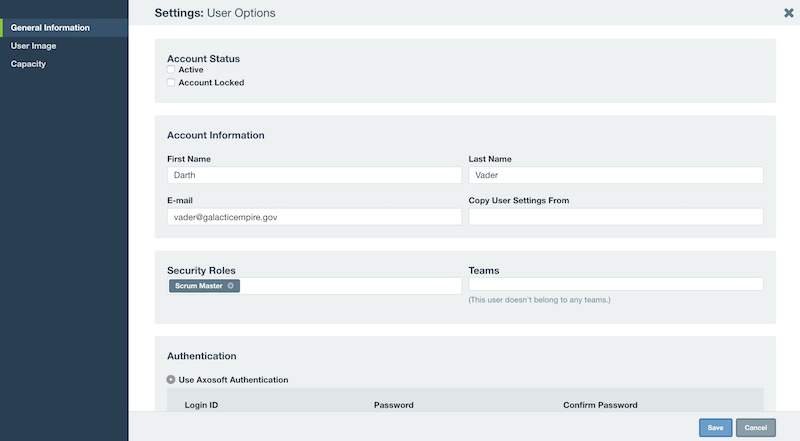
To create a new user, click the Add button. This will bring up the user settings screen. Here you can enter their first and last name, email address (which is utilized for email notifications), add security roles, and select whether to copy user settings from another user, which includes their currently applied views and other options.
When you add a user, Axosoft will send an activation email to them, which will allow them to set their password, or you can choose to set their password manually. The user can then log in and update their password by clicking on their name in the upper right of the Axosoft window and selecting Change Password.
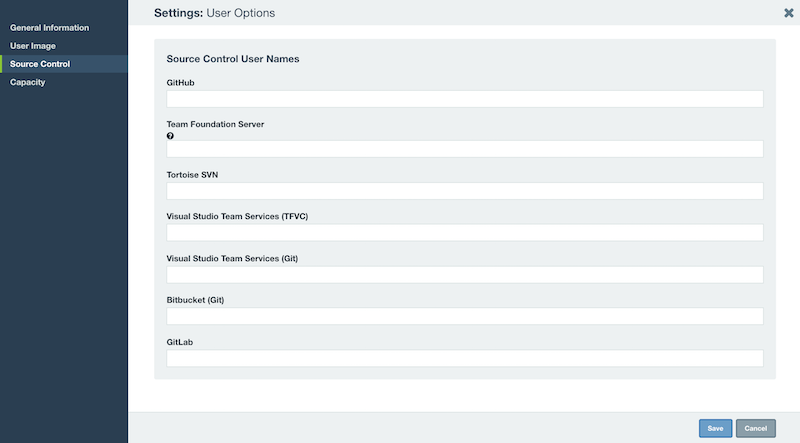
Source control
When adding commits using source control management tools like GitHub and Team Foundation Server, you can associate the commit with the correct user. Enter their SCM username here.
Authentication
Axosoft has three authentication options: Axosoft, Windows Integrated Authentication, and Azure Active Directory Authentication. This configuration will determine how a user logs into your Axosoft account.
Axosoft Authentication
The first authentication option is a built-in method known as Axosoft Authentication. This method simply asks the user for their login ID and password every time they try to connect to the Axosoft system. These unique usernames and passwords are stored in your Axosoft database. This method is ideal for external users who don't necessarily have a domain account on your corporate network.
Windows Integrated Authentication
Axosoft also provides Windows Integrated Authentication for Axosoft Installed. This method checks the currently logged in Windows user and tries to automatically log in that user into the Axosoft system using their domain credentials. Users must still be created in the Axosoft system, but they will not have to provide any login information if they are already logged into their Windows Active Directory account.
Azure Active Directory Authentication (Hosted only)
Azure AD authentication is available for hosted accounts on an Axosoft Premium subscription. There is no additional cost for Microsoft Azure accounts with Azure Free, Basic, or Premium plan. This integration supports login.microsoftonline.com, Azure AD Join, and Active Directory Federated Services setups.
Please reference our Azure Active Directory Integration page for additional instructions.
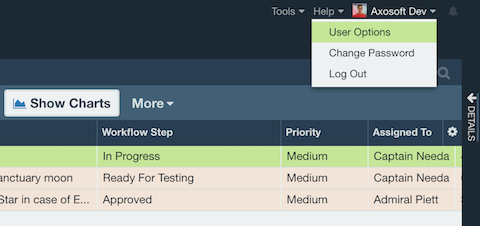
User Options and Settings
Users can click on their name in the upper right corner of the Axosoft window to change their preferences and other settings.
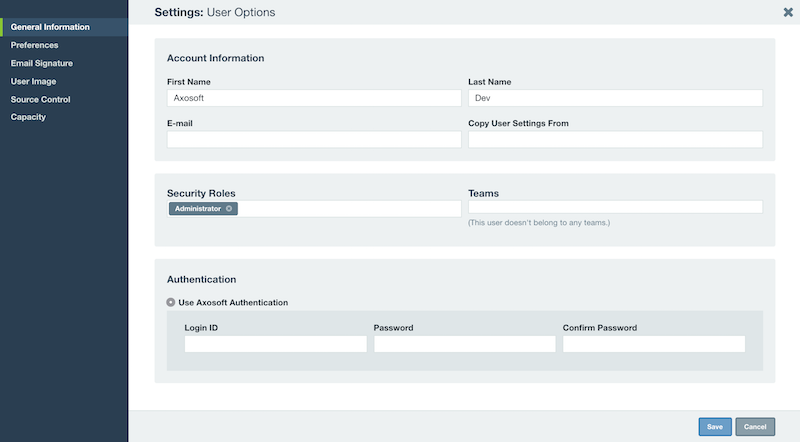
General Information
Set basic options like name, authentication, security roles, and more just like when creating a new user.
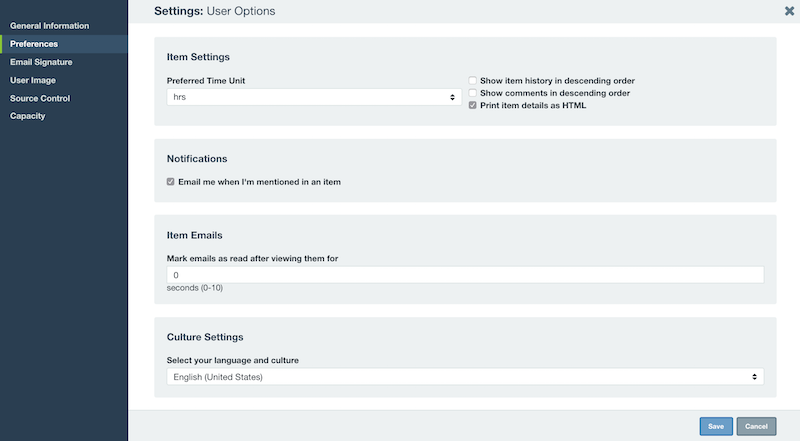
Preferences
Set users preferences for application settings.
Email Signature
You can add an email signature to automatically populate when writing new emails on items.

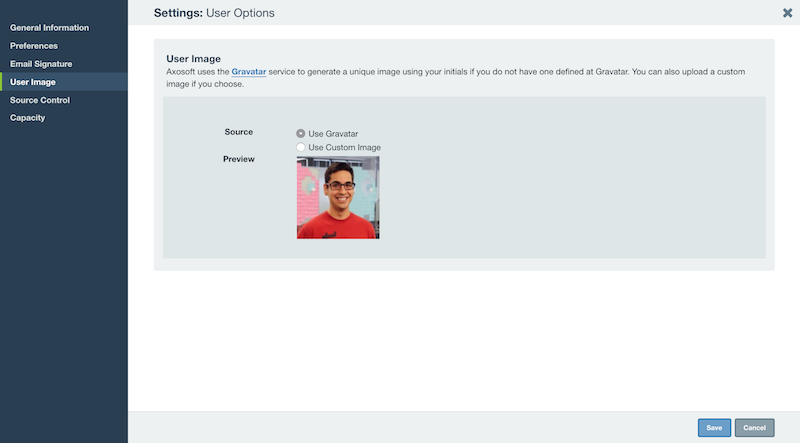
User Image
You can add an image for each user by using Gravatar, or uploading a custom image. This image will be used in the Users & Teams pane in the Organize Panel, Card View item cards, and Standup mode.
Source Control
Source Control allows management of user names used in available integrations.
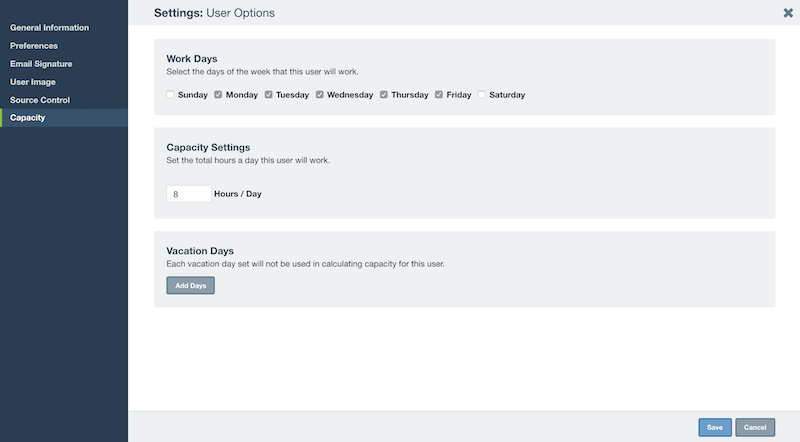
Capacity
User work days, hours, and vacation can be set from Capacity. This data is used for Release Planner and calculating release velocity.