Quick Start Guide
This page details the basic process for adding an item to a backlog, and customizing the data hidden or visible on the field template.
Axosoft Interface
What you see in Axosoft is governed by your Tab selection. By default, you may have tabs like Work Items, Release Planner, or Dashboard. Clicking each of these will change what you see in the application, and you have the ability to add additional tabs by clicking this icon.
Under each item tab, Axosoft is split into three major sections:
- The organize panel on the left highlighted in green
- The main workspace in the center highlighted purple
- And the details panel to the right highlighted in yellow
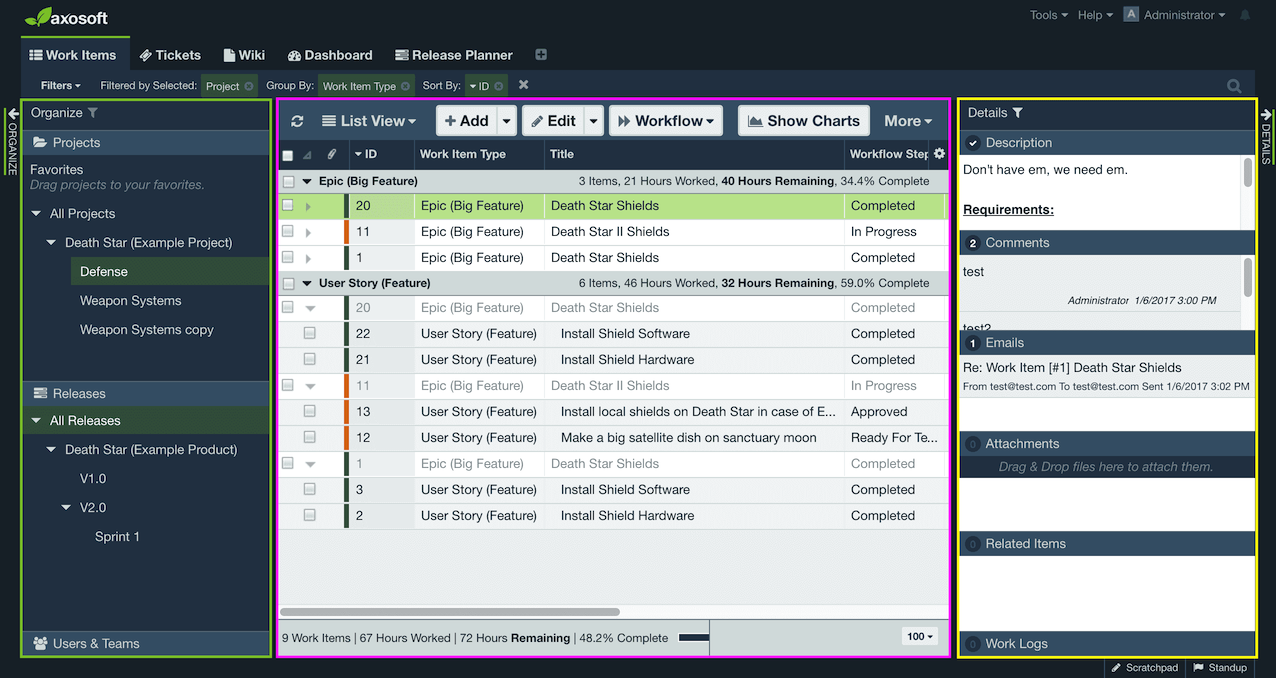
The Organize Panel is where all your Projects, Releases, Customers, and Users and Teams will live. The selection you have in any of these panes will automatically filter what you see in the workspace.
The Workspace in the center will be where your items are displayed. You can toggle between list view, card view, and rank view.
Finally, the Details Panel on the right will give you a synopsis for items you have selected in the main workspace. This is a great way to get a snapshot of an item’s description, notes, comments, work logs, or whether or not it has any subitems.
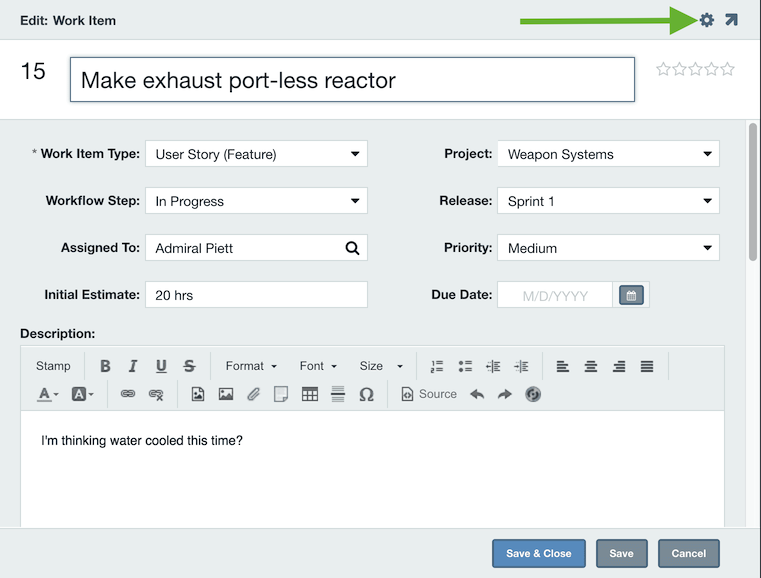
Adding items
Click Add, the first button in the workspace toolbar to get started. The workspace toolbar can be found above the items on the grid in your Axosoft workspace.

Once you add an item, you will be able to go back and edit. You can decide to include estimates when you initially add the item or come back to it later when your team is ready for formal backlog grooming.
The Item field template
Field templates are the forms you fill out to create or edit a backlog item. They are heavily customizable, and you can create multiple variations for different projects, workflow steps, email notifications, and more. To edit the field template currently shown, click the gear icon in the upper right.
Working with fields
The Field Template Editor breaks your field template down into two main sections: Visible Fields and Hidden Fields. The Visible Fields section shows exactly what the field template will look like. You can drag and drop fields around to customize the layout, or move fields between Visible and Hidden to show or hide them.
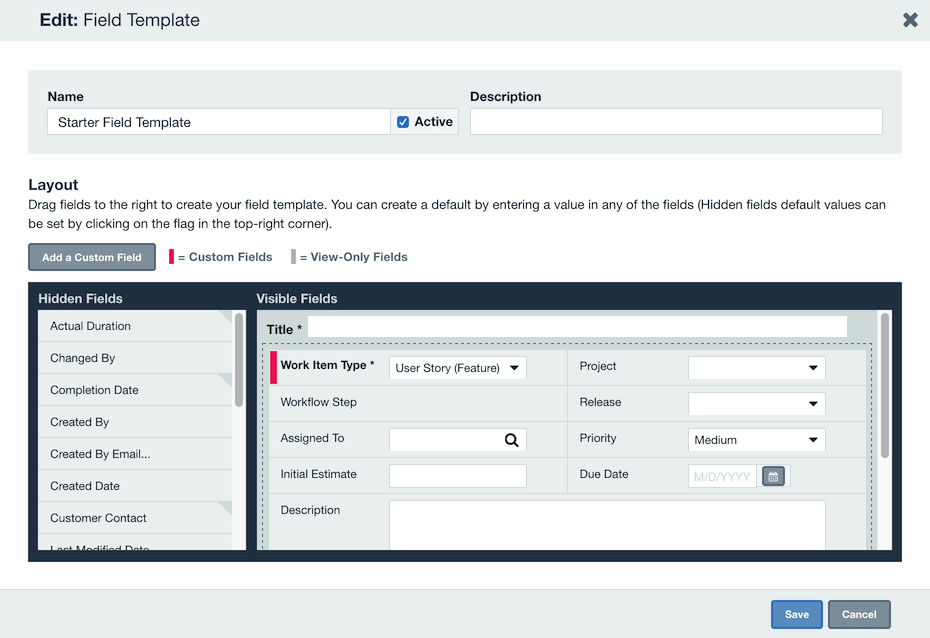
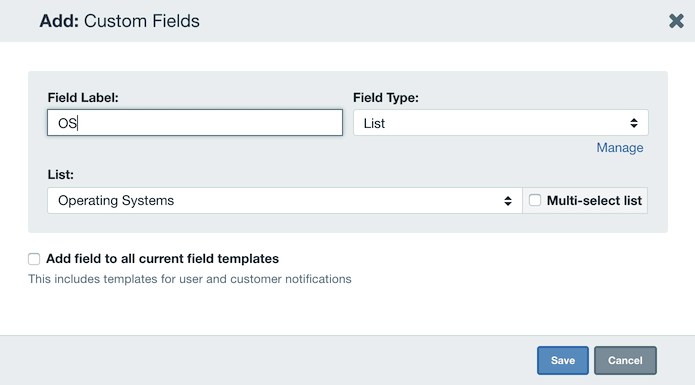
Custom fields
To store data in fields that are not included by default, Axosoft supports custom fields. To create a new custom field, click on Add a Custom Field.
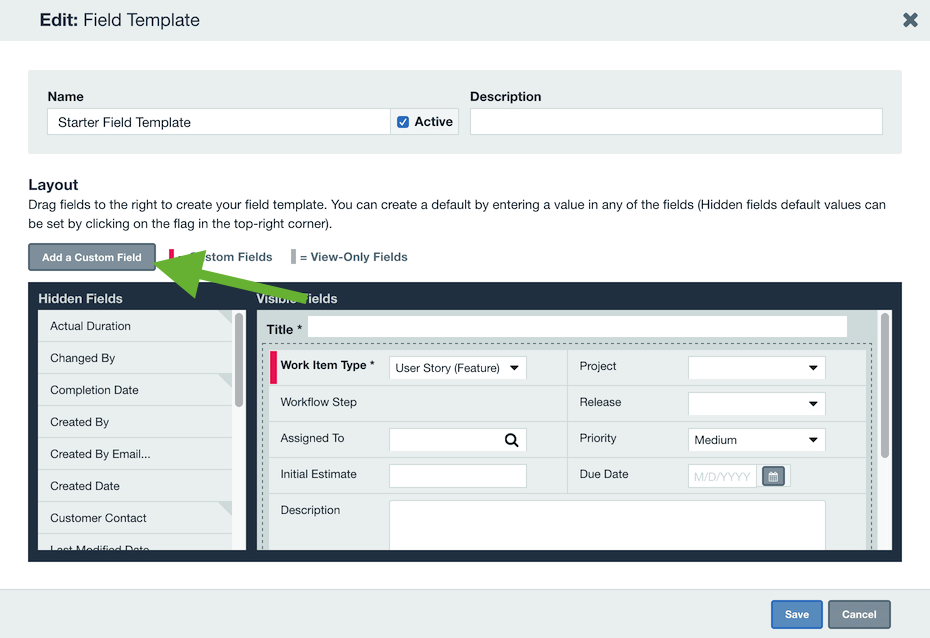
There are several different types of fields in Axosoft. Name the field, select its type, and click Save. The field will then appear in the Hidden Fields for all field templates.
Drag the custom field into Visible Fields to add it to your field template. At any time you can click Save to save your field template and return to adding or editing your backlog item.

You're now ready to start entering items into your backlog! You can also import existing data using the Import Wizard.