Release Planner
The Release Planner introduces a new way to approach resource allocation for your sprints and releases. We made this with the intent to minimize the time added to a project or release caused by improper planning. It is an easy way to visualize who has availability and how much work can be planned for a given sprint or release.
Planning for a release
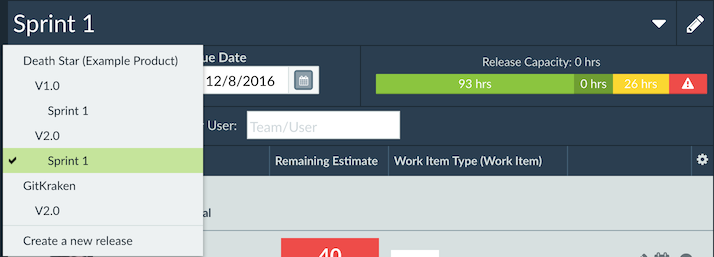
To get started with the Release Planner, first choose a release by clicking from the release dropdown menu. You may also choose to create a new release from either the planner or from the Organize Panel.
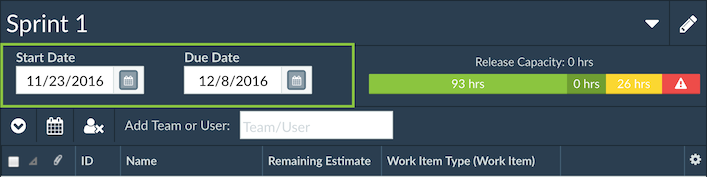
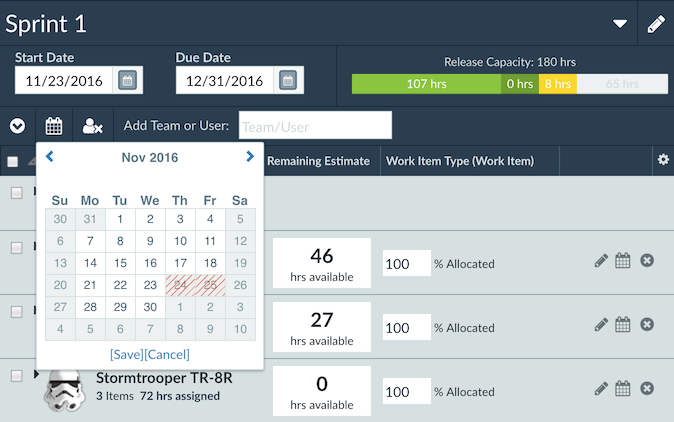
Next, choose when the release will start and when it is due for completion. Click and select a start date and a due date from the date picker.
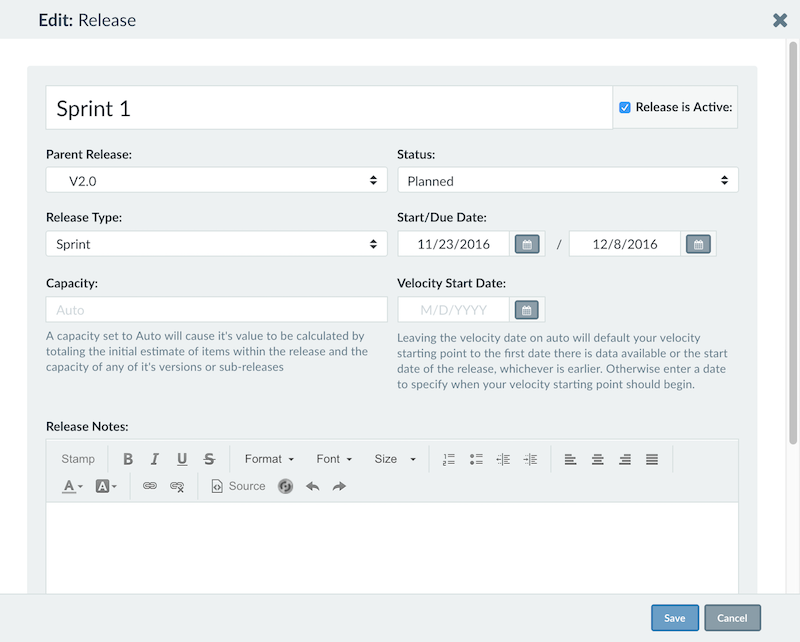
Editing release details from the Release Planner
To edit the release details, click the Edit icon directly to the left of your release capacity. From the dialog window you can edit any of the release content.
Distributing work
Now that you have your release selected and when it will finish, add who will be working on items in the release. Click the text dropdown for Team/User and begin to type the name of the user to add to the release.
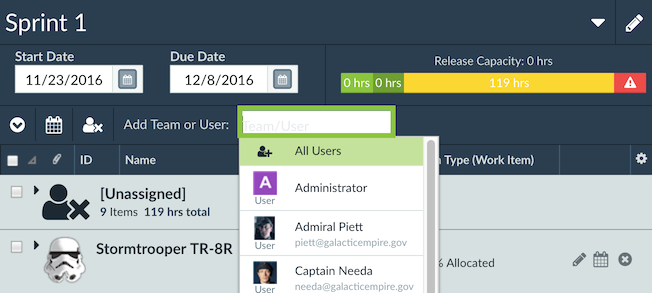
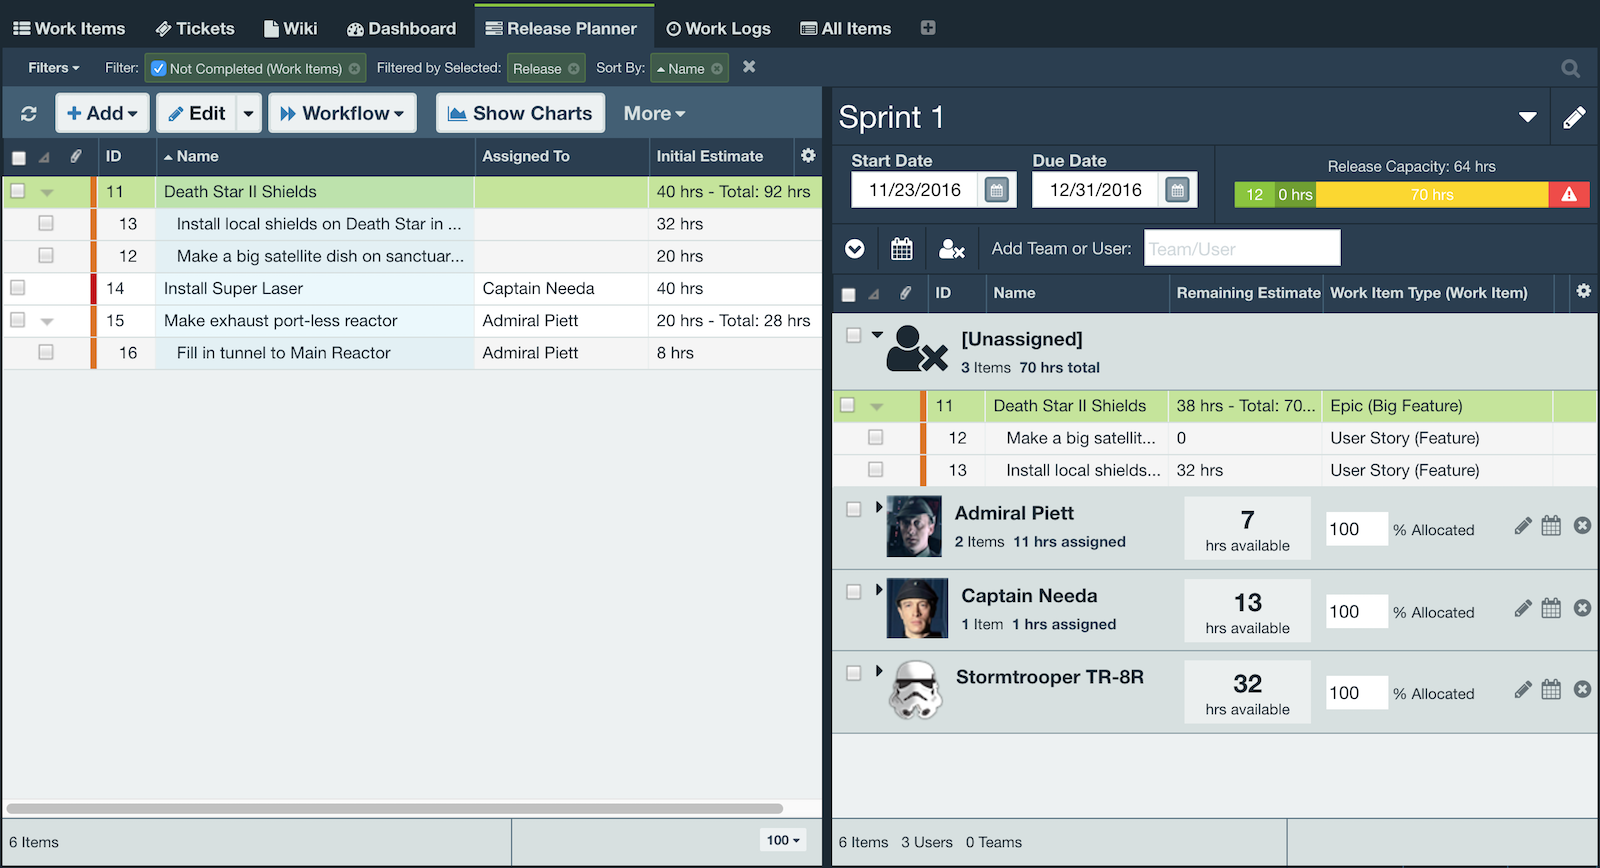
The Release Planner workspace now contains everything you need to get started planning the release. You can multi-select the items you wish to assign and drag and drop them onto the release.

Once assigned to the release, you are then able to choose who will be given work.
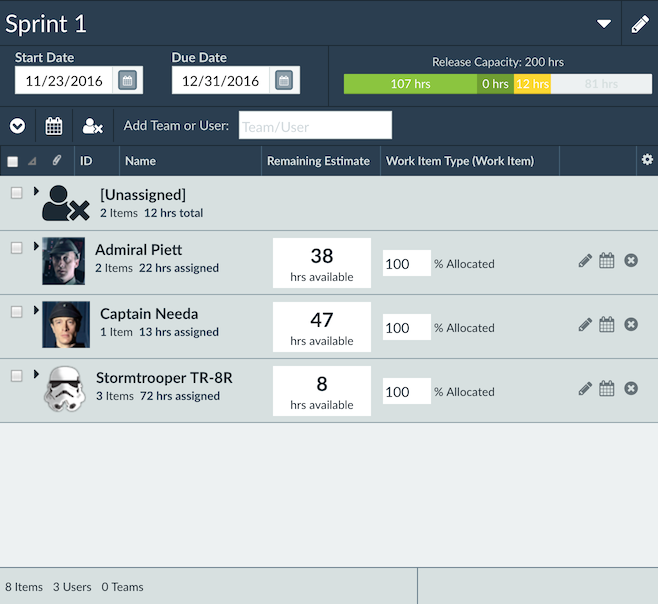
Drag and drop the items to each team member to distribute the workload.

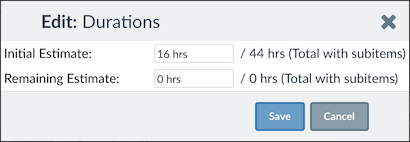
Quickly estimate the selected item on the left using the short cut D.
Expand and collapse entries in the Planner
To expand and collapse the user's assigned items, click the toggle button to the left of the Add Team or User field. The down arrow represents an expanded section where the right arrow is collapsed.
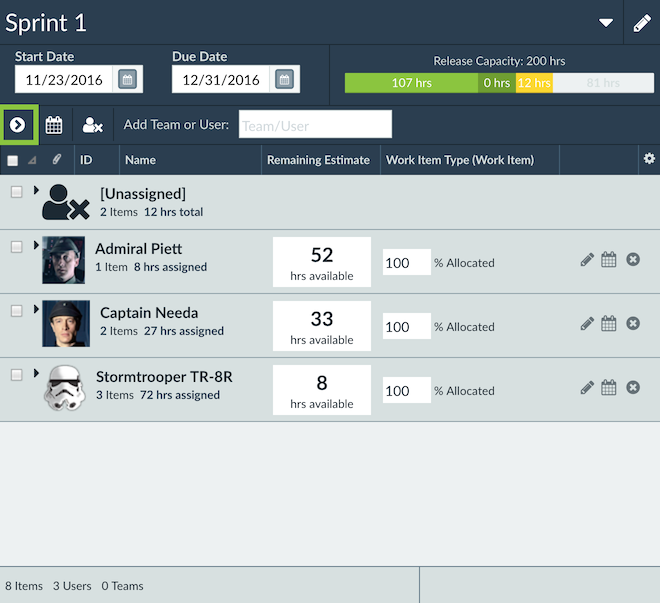
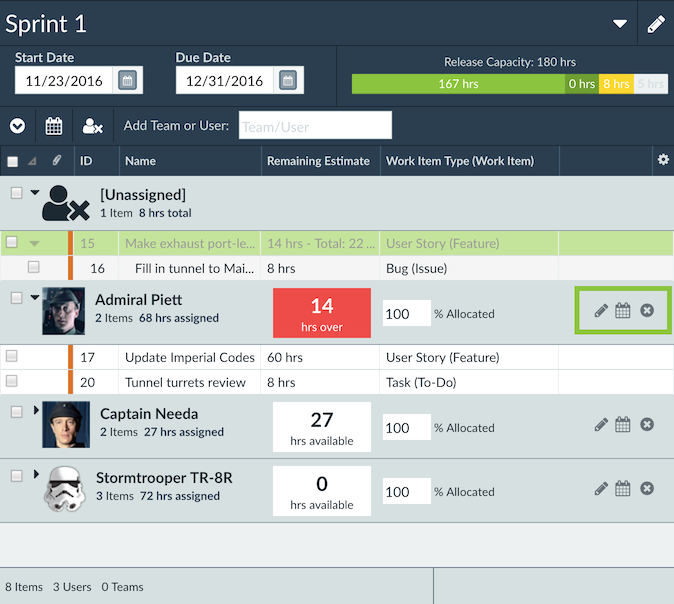
Release capacity
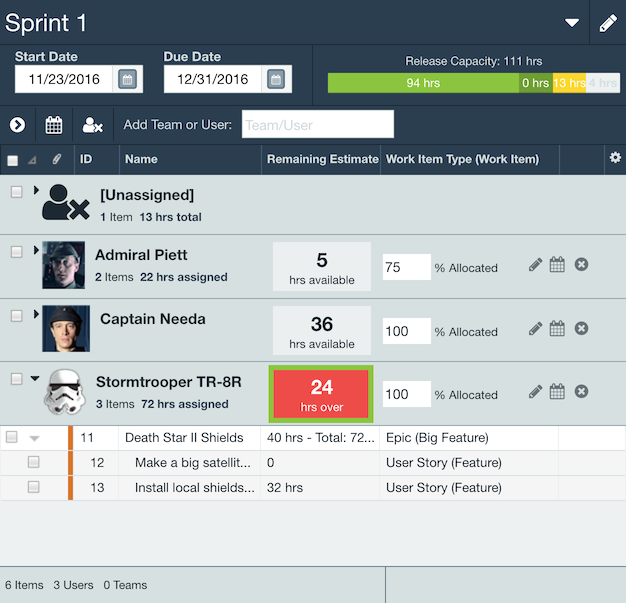
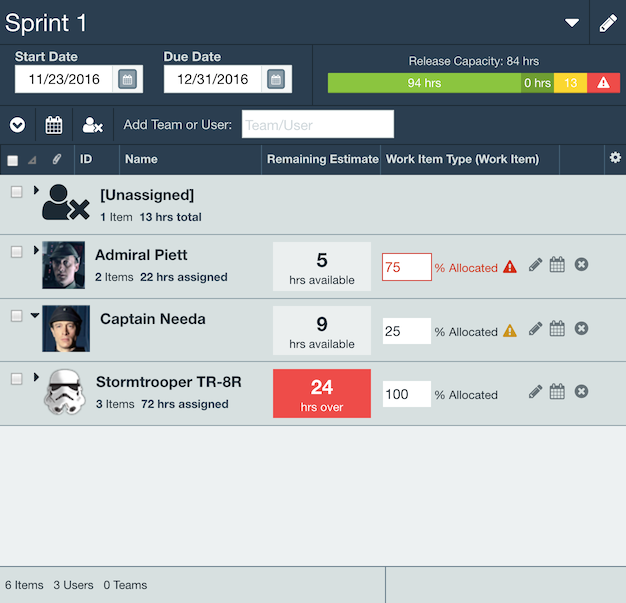
Planning your release regarding time and resources available is easily manageable with the release planner where you can view your users' capacity and the release's capacity. A user's capacity will turn red if more work is assigned than their capacity allows. The release capacity will also turn red if exceeded overall.
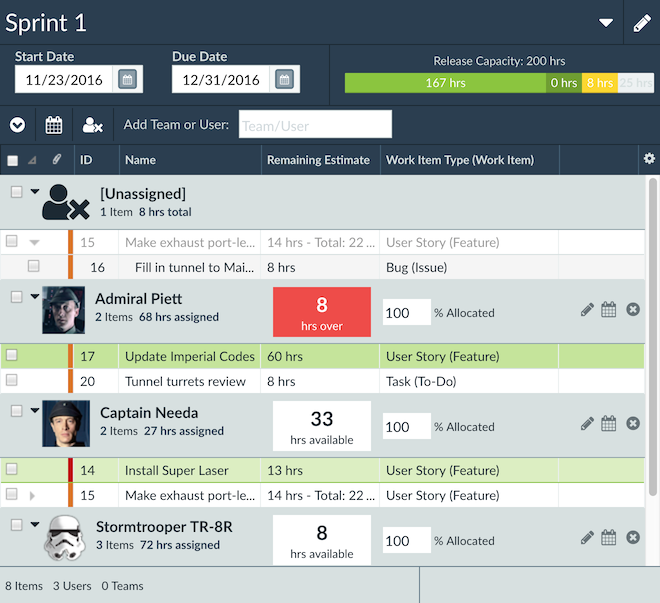
User and team capacity
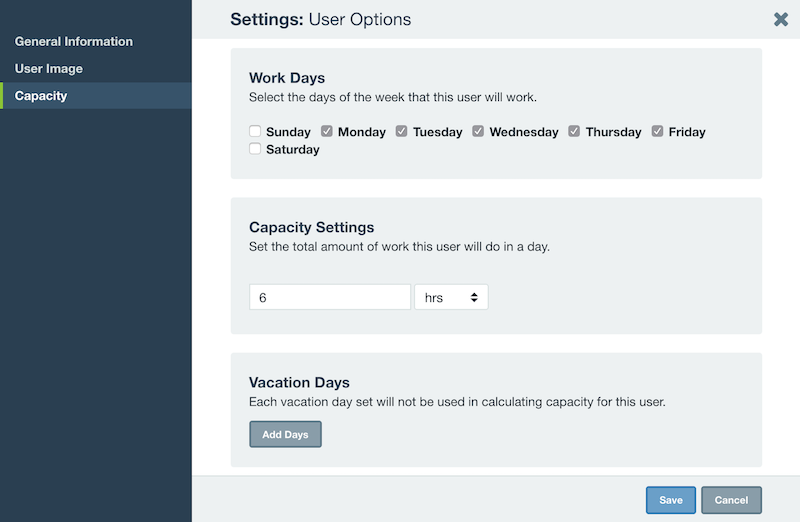
You can also edit a user's capacity by clicking on the edit icon to the right of their name.
Here there are options to check or uncheck work days, modify capacity per day, and the vacation days planned for releases.
While the capacity defaults to hours, capacity can be set in other time units like minutes, days, or story points.
Note: The Release Planner will display capacity in terms of your set time unit from the More menu in the main toolbar (next to the Show Charts button).
Global Holidays can be set by selecting the icon and choosing the days to block out. This will remove these days from your user capacity calculations so you get a much more accurate picture.
To edit holiday for multiple users at once, go to Tools People Users. Select the checkbox for each user you wish to change, then right click and choose Edit Vacation Days.
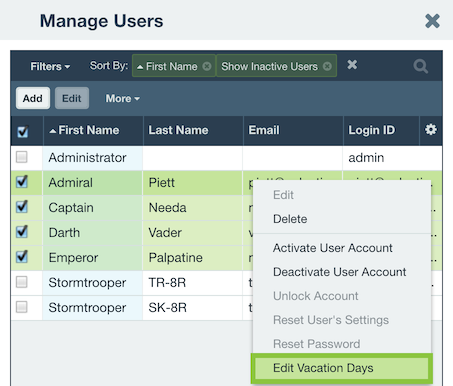
In the choose the days to black out and click Save.

Resource allocation lets you see how much work users have across releases during the same time. The alert indicates the percentage of their allocation in other releases.
If you hover over the alert, you will get a list of the other releases this user has assigned. Use this information to make adjustments:
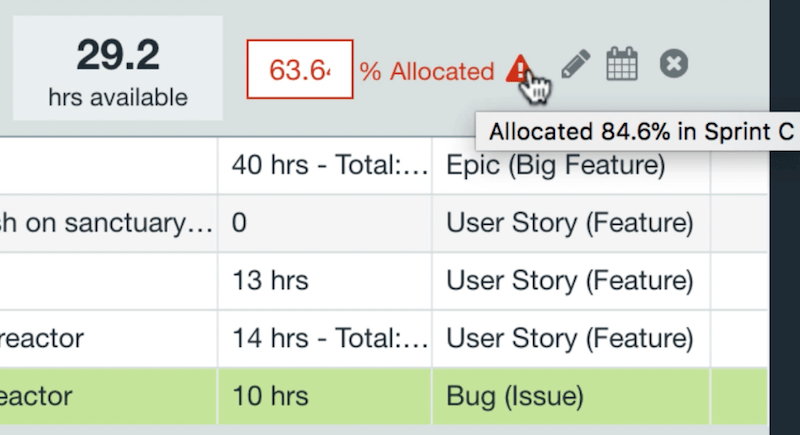
Over allocation of a user is indicated in red. This is used as an indicator to allow adjustments to be made when there is too much work assigned to a user compared to capacity.