Managing Customers
Portal users and customer contacts associated to your Help Desk items are registered in Axosoft as contacts, who are associated with a company. A company can have multiple contacts associated with it. The customer list on the Manage Customers window displays a list of all the companies in Axosoft and the number of contacts associated to each company.
Managing Portal users
Although the Customer Portal web site can allow anonymous access to Axosoft items, you may wish to restrict access to the site to registered customers.
You can manage the registered customers through Axosoft using Manage Customers and Contacts in Tools Customer Portal Customers.
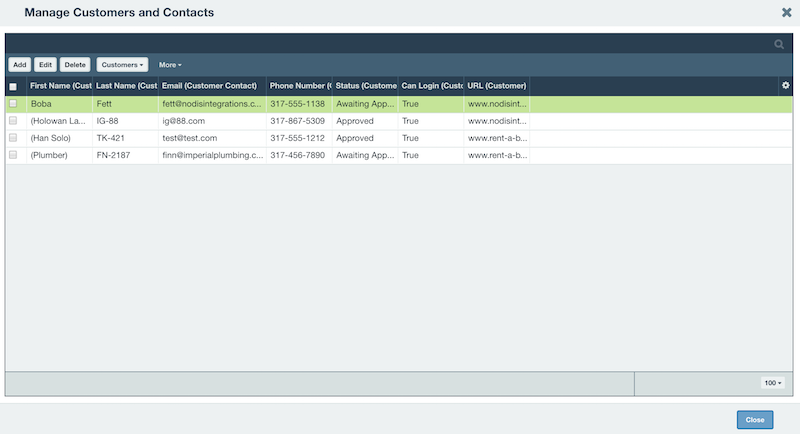
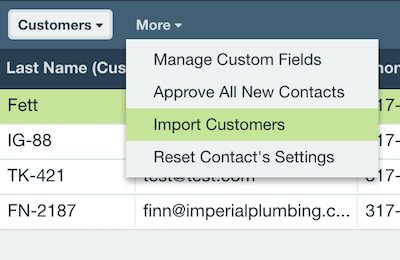
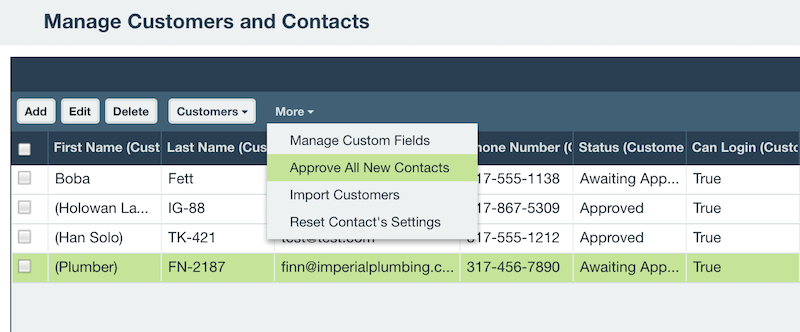
You may import customer contact using a .CSV file by clicking on the More button at the top and then mapping over the fields.
Adding a contact
To add a new customer contact to an existing company, from the Edit Customer window, in the Contacts section, click the Add button.

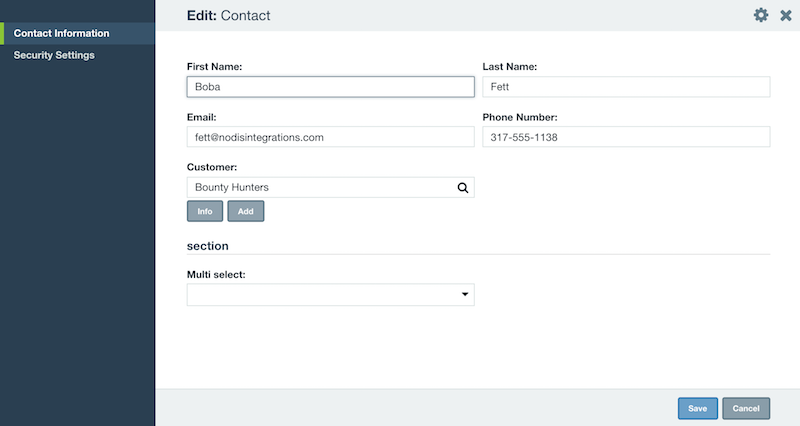
In the Contact Details section, type in the customer's first and last names, email address (which will be their login for the Portal web site), the password and confirmation, a phone number if applicable, and the customer's status (“Approved”, “Rejected”, or “New”).
Editing a contact
Select a customer contact and press the Edit button to display the Edit Contact page.
Importing customers
To import customer and contacts using a .csv file, click on More at the top of the page and select Import Customers.
Deleting a company or customer contact
From the Manage Customers window, select the company and click the Delete Customer icon under Actions in Web. You will be asked to confirm the deletion of the company.
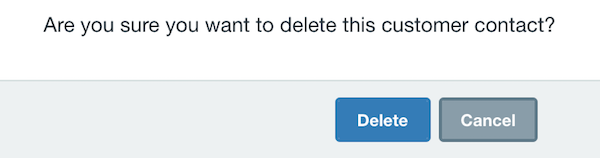
To delete a customer you must first select the customer from the Contacts section and click the Delete button. You will be asked to confirm the deletion of the customer.
Approving customer contacts
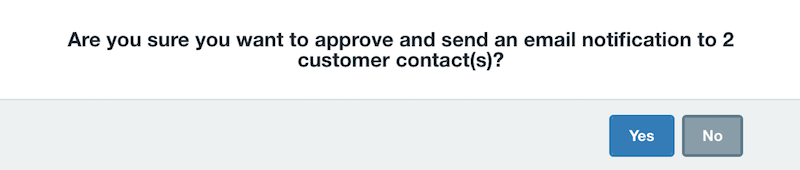
If you are requiring customer contacts to be approved upon registering as in Portal Settings, they can quickly be approved by an Administrator.
From the Manage Customers window, click on More at the top of the page and select Approve All New Contacts.
You will be asked to confirm the approval and also notification of the contacts if Send approval email to customer is enabled in Portal settings.